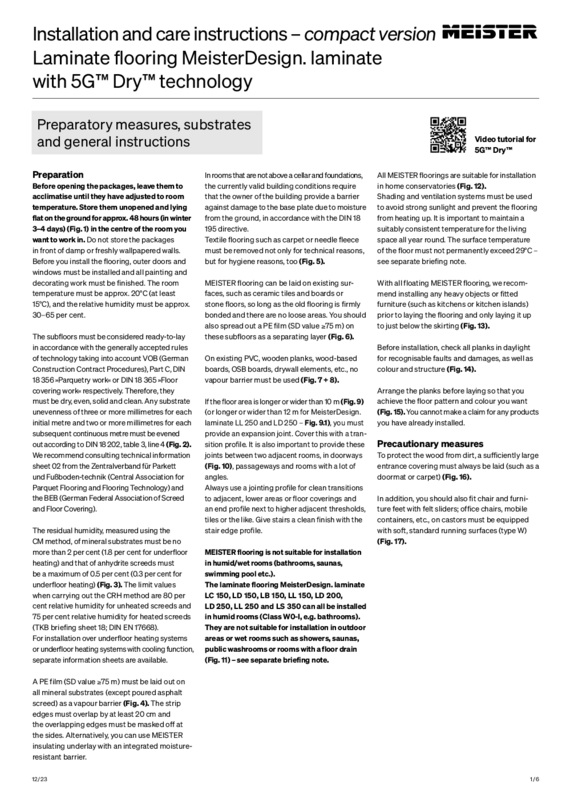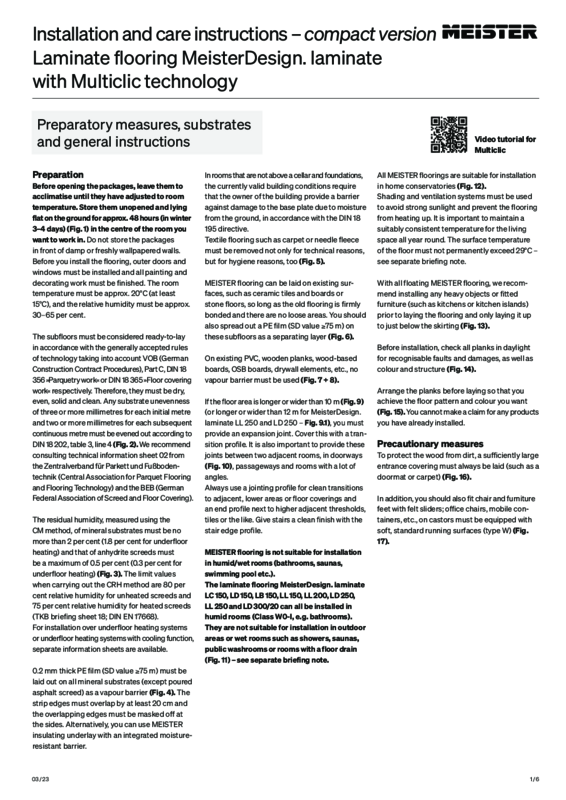

Laminate flooring is very straightforward - beginning with installation! Laminate is installed as a floating floor – in other words, it isn’t glued to the subfloor, but is placed loosely on the subsurface or a suitable underlay. Thanks to the modern click systems, this type of installation is not only simple and tidy (no adhesive needed!), but extremely sturdy too. MEISTER click laminate flooring uses a range of click laminate systems, depending on the selected floor: 5G™ Dry™ and Multiclic.
The 5G™ Dry™ click system is a premium, water-resistant, 5G™ fold-down system that enables secure and water-resistant locking of the planks. The LL 250 and LL 150 (S) are equipped with 5G™ Dry™. With Multiclic the planks are joined together with a tapping block and light taps with a hammer. The following collections are available as click laminate with Multiclic: MeisterDesign. laminate LD 250, LB 150, LD 200, LD 150, LC 150, LD 55 and LC 55 (S). MEISTER laminate flooring is the perfect durable, low-maintenance choice for every room! They are suitable for installation above underfloor heating, in humid rooms (except for LD 55 and LC 55 (S)) and in rooms with floor-length windows. Please observe the separate information sheets for installation in these rooms.
Our simple step-by-step instructions enable you to easily install your new click laminate floor by yourself - whether you’re experienced at DIY or a total novice!
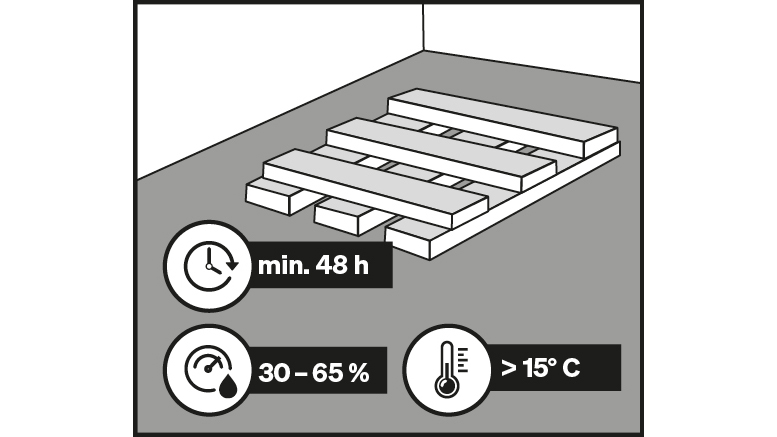
Laminate is made largely of wood and must first acclimatise. To that end, prior to installation, unopened laminate packs must be stored for approximately 48 hours in the room where they are to be laid later. The room temperature must be approx. 20°C (at least 15°C) and the relative humidity must be approx. 30–65 percent.
Heavy objects and built-in furniture (such as kitchens, kitchen islands, etc.) should be installed prior to laying the flooring and the flooring laid up to just below the skirting, to allow the floor to move freely.
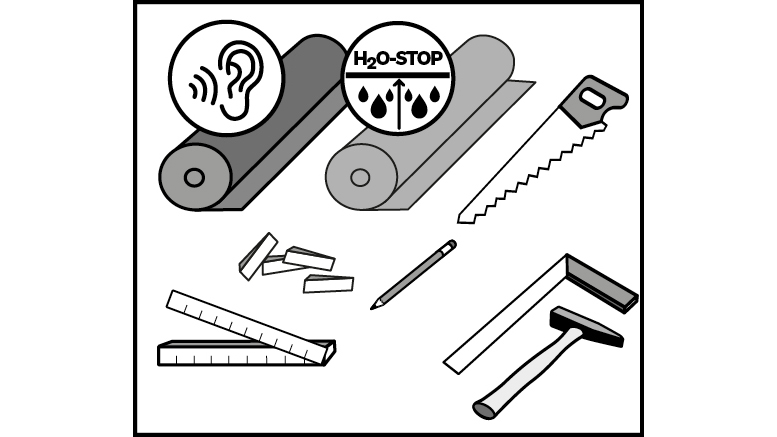
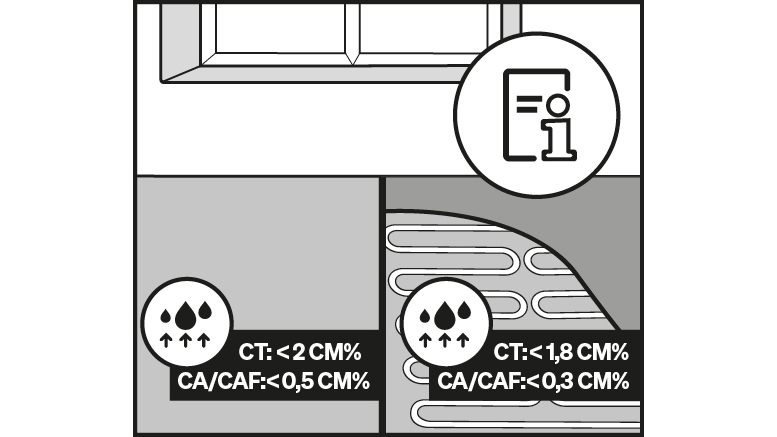
Your subfloor must be dry, clean, even and firm before it is “ready for an installation”. Any subfloor unevenness of three or more millimetres for each initial metre and two or more millimetres for each subsequent continuous metre must be evened out.
The residual humidity of mineral subfloors, if measured using CM devices, may be no more than 2 percent (1.8 percent for underfloor heating). For anhydrite screeds, the limit is 0.5 percent (0.3 percent for underfloor heating). Different limit values apply if residual humidity is measured using the KRL method; see compact installation instructions available for download.
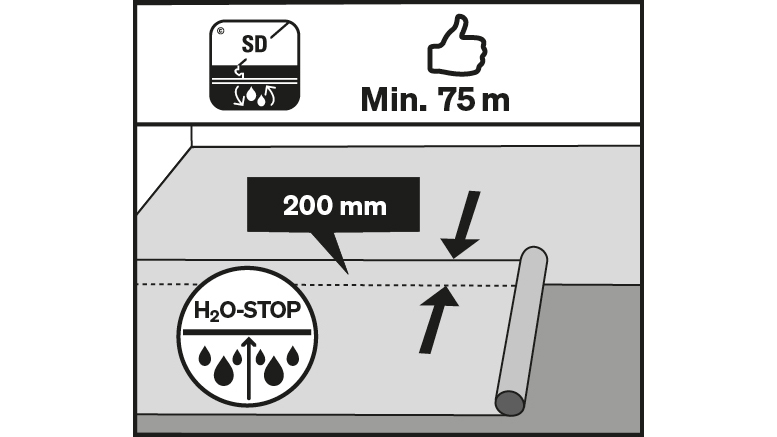
Several MEISTER laminate floors are already fitted with a sound-absorbing cushion, which you will recognise by the “S” for “‘Silence” in the product name. These models do not require any additional sound-absorbing cushions.
On mineral subfloors (except for poured asphalt screed), however, you will require a thin PE-film vapour barrier (SD value > 75 m) to prevent any rising damp. If you have opted for flooring without a built-in sound-absorbing cushion, use a MEISTER underlay with an integrated vapour barrier on your laminate flooring, e.g. MEISTER Silence 15 DB.
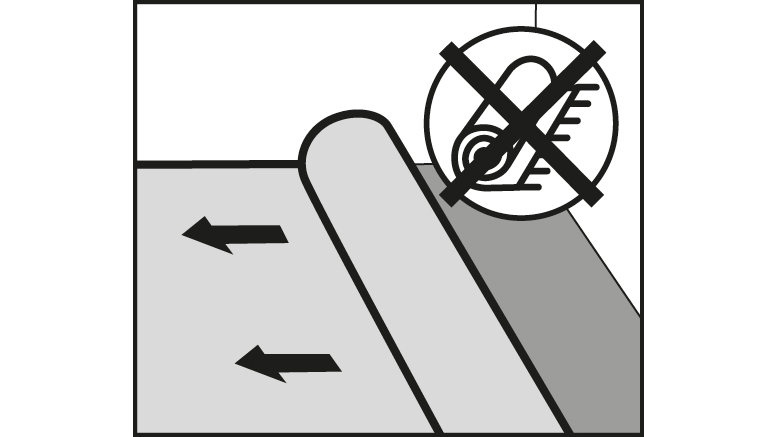
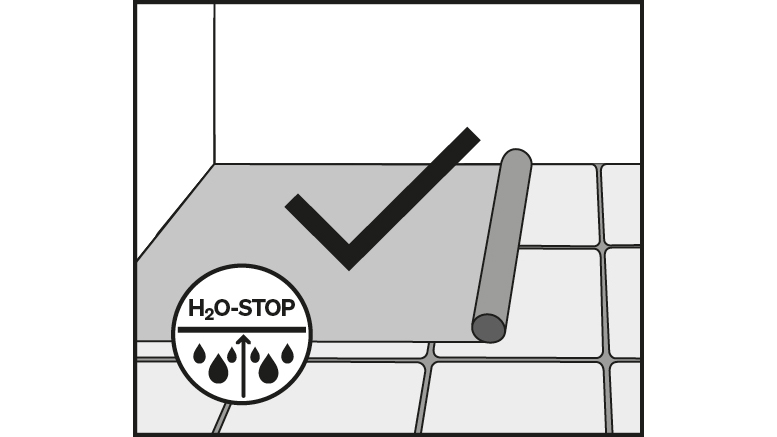
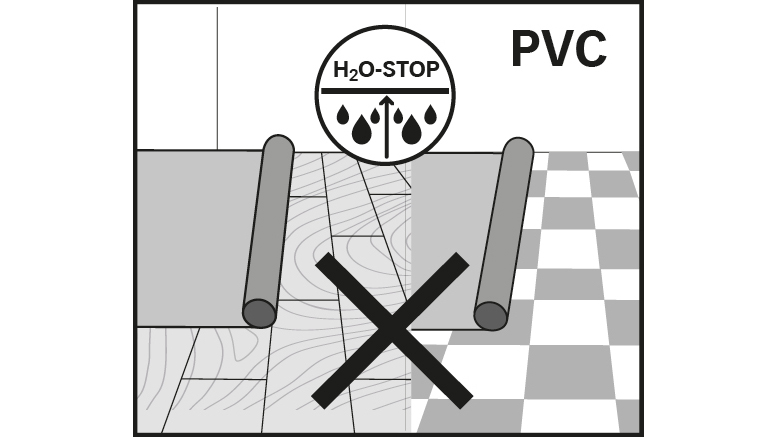
Think “renovation”: you can install laminate flooring on other floor types too. The most important thing is that the floor is even and does not show any signs of damage or loose areas. We recommend that you don’t combine this flooring with carpet – for hygiene and stability reasons, you should remove your carpet prior to installing laminate. When installing laminate flooring on old tiles, boards or stone flooring, a sheet of PE film should be used as a separating layer. On existing PVC, wooden planks, wooden materials, drywall elements, etc., no vapour barrier must be used.
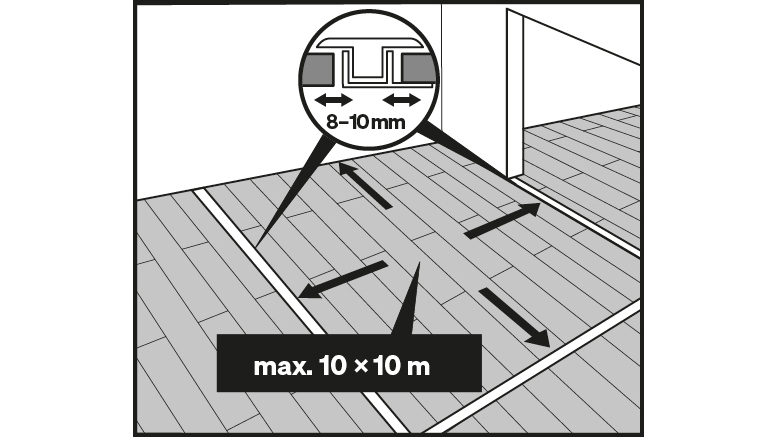
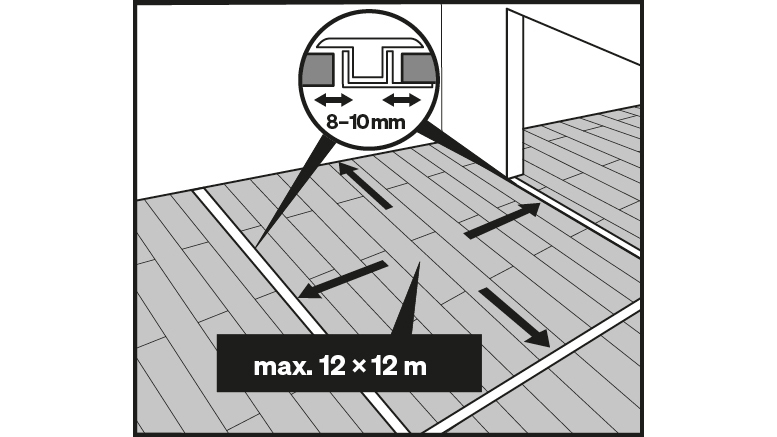
Laminate flooring from MEISTER can be installed without interruption across an area of up to 10 x 10 metres. The LL 250 and LD 250 collections can be installed across an area of up to 12 x 12 metres. If the floor area is longer or wider than 10 or 12 metres respectively, you must provide an expansion joint. Expansion joints are also necessary in the following locations:
For clean transitions to adjacent surfaces (including with a height difference) or ends, the MEISTER product range offers a large selection of joining profiles, end profiles and transition profiles. Give stairs a clean finish with the stair edge profile.
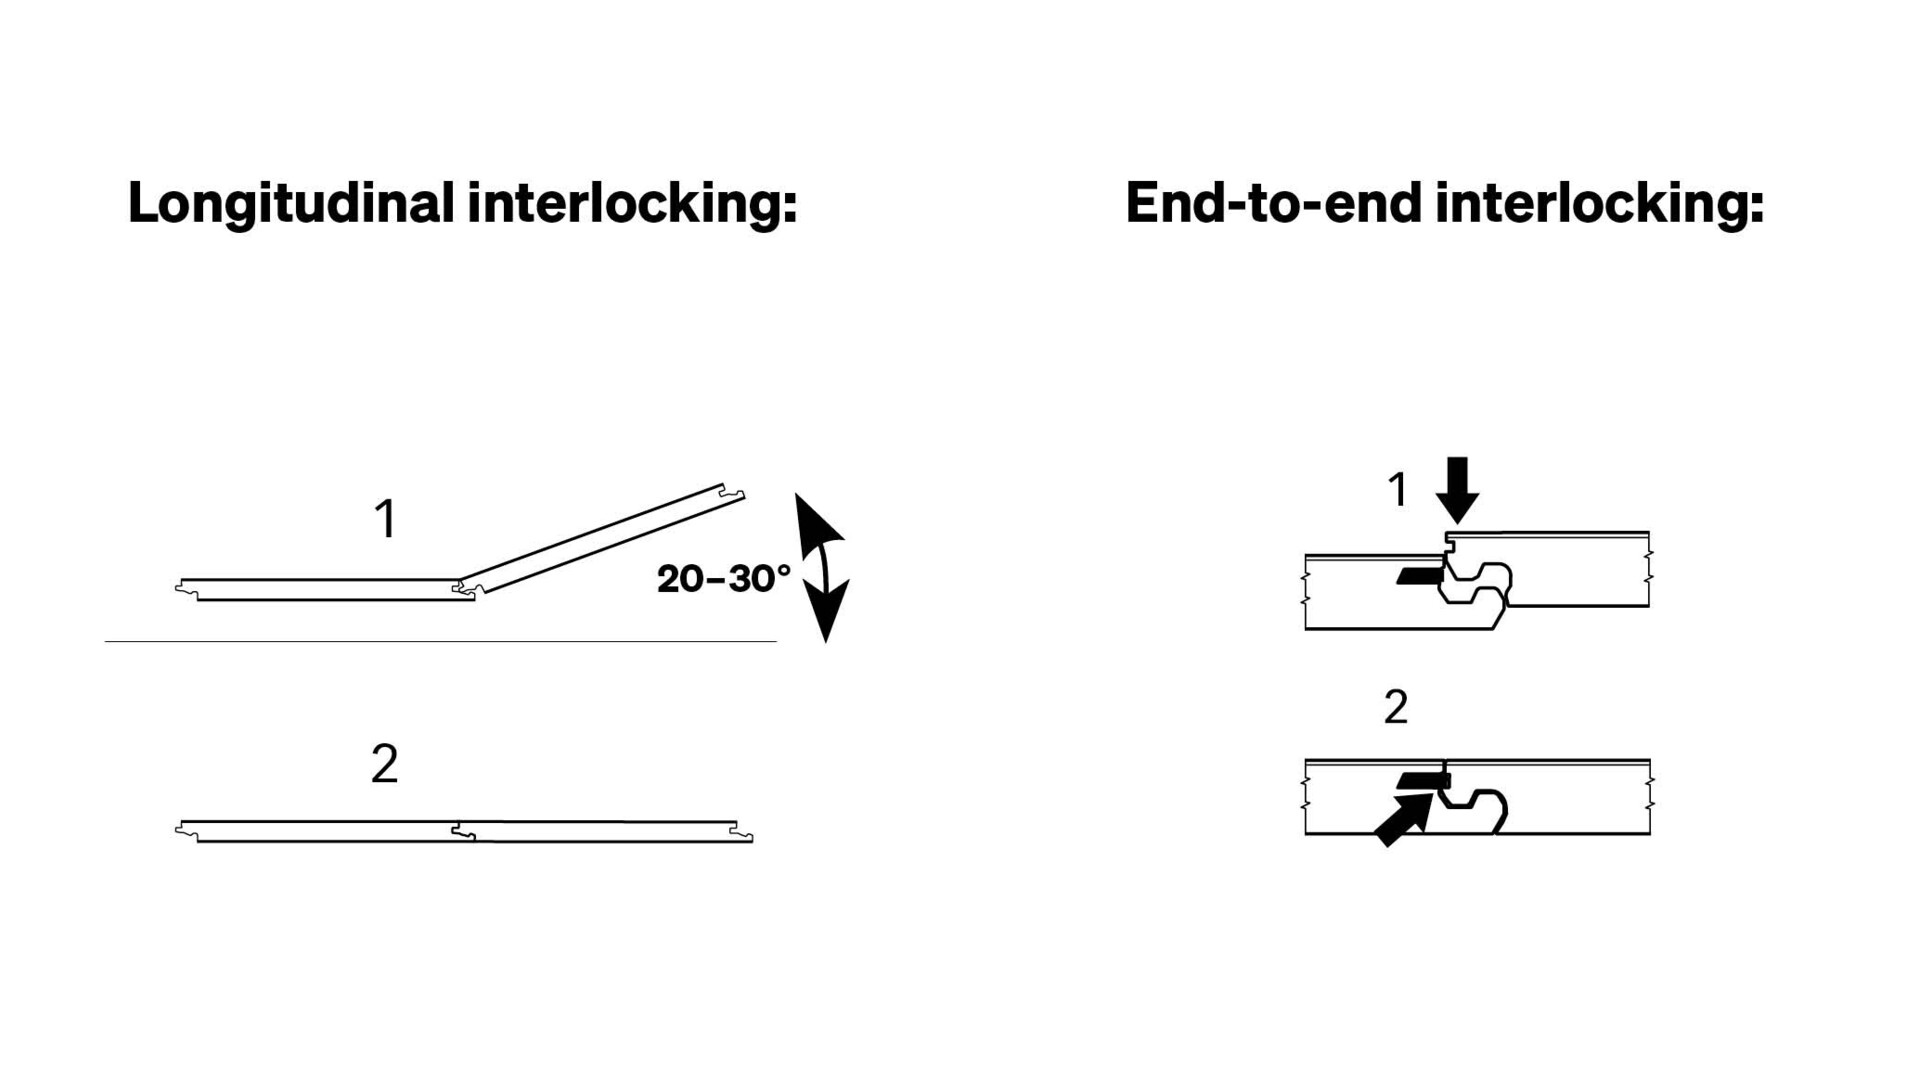
With the 5G™ Dry™ premium fold-down click system, laminate flooring is installed as a floating structure without glue. The 5G™ Dry™ connection system makes it possible to install the flooring quickly and easily. In addition, it is a valuable installation aid, as the planks can be aligned against each other in this way. To do this, lift the plank slightly and square it with the tongue in the groove of the plank that has already been laid, before pressing it down. The secure connection between the planks is confirmed with an audible click. The 5G™ Dry™ click system is absolutely tight and provides increased water-resistance, as liquid cannot penetrate the locked tongue-and-groove connection under the floor.
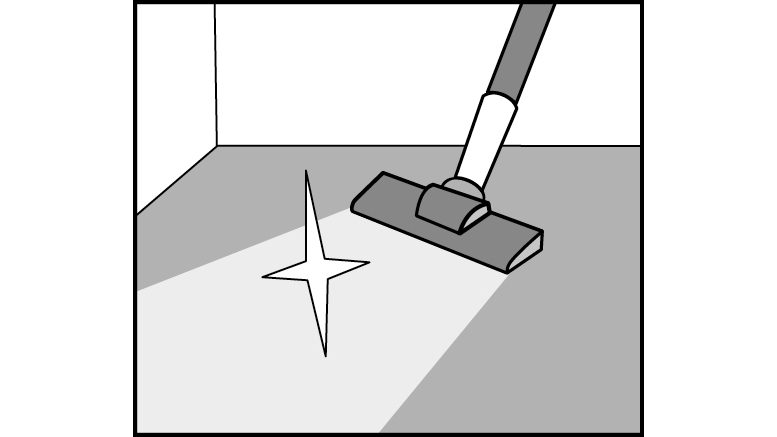
Remove any dirt, small stones, etc. from the surface. Start by laying the necessary underlay (see “Subfloor” section above).
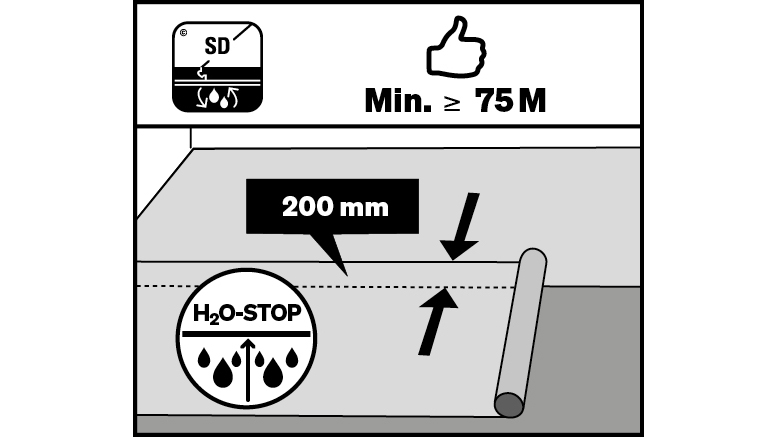
A PE-film vapour barrier must be laid out to form a “bath” on all mineral subfloors (except poured asphalt screed). The strip edges must overlap by at least 20 cm and the overlapping edges must be masked off. Alternatively, you can use a MEISTER insulating underlay with an integrated vapour barrier, e.g. MEISTER Silence 15 DB. The MEISTER insulating underlay must have a pressure resistance of >15 kPa in the private residential sector or >60 kPa in the commercial sector.
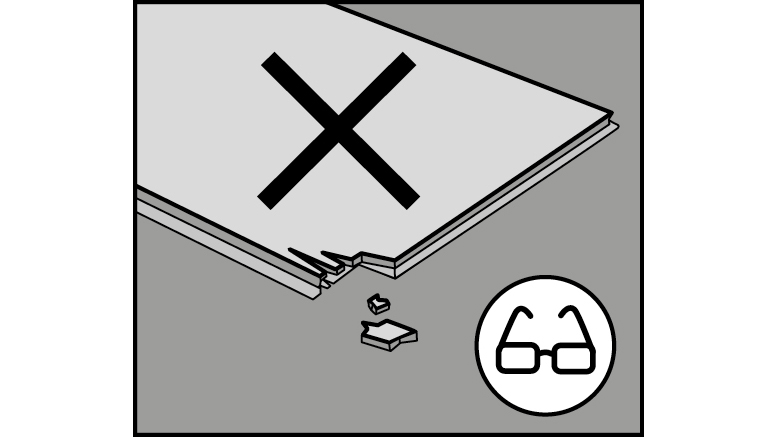
Before installation, check all planks in daylight for recognisable faults in colour and structure. Goods already installed cannot be claimed for later.
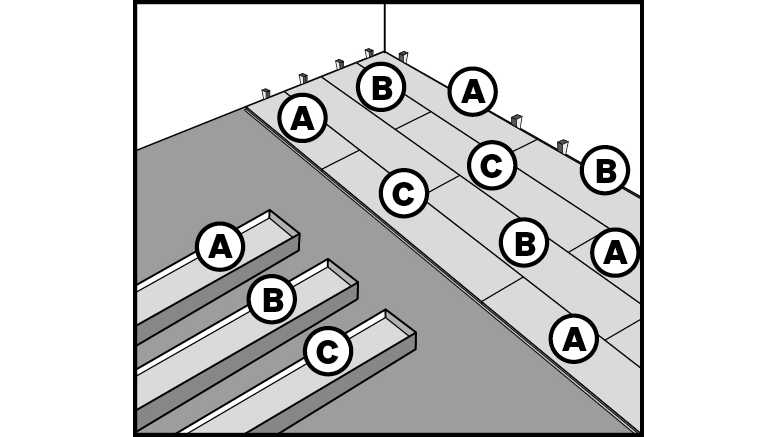
Install a mixture of planks from different packages.
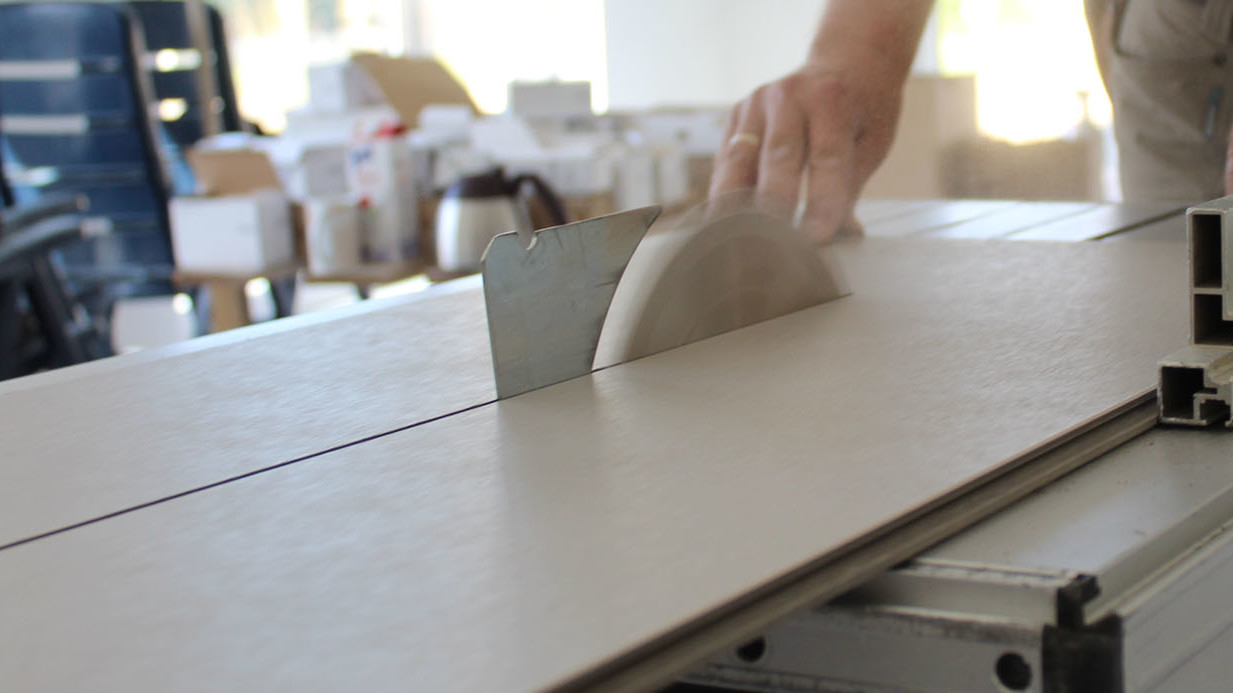
When sawing the elements, make sure you work from the correct side: if you use a bench saw, keep the decorative side facing up, if you use a keyhole or portable circular saw, keep the decorative side down.
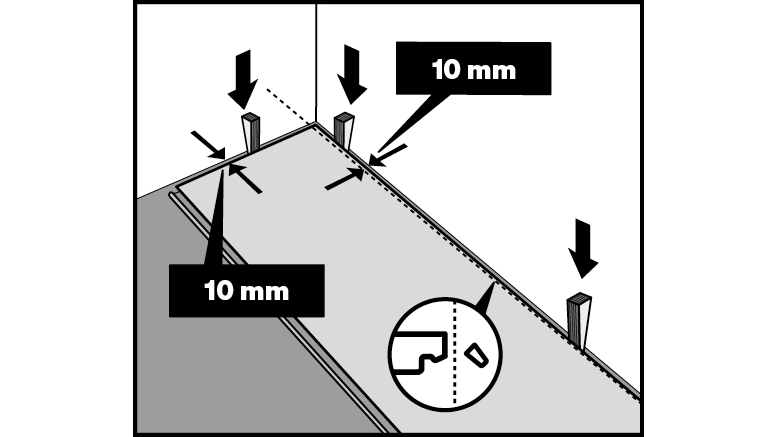
Start by laying the first complete plank in the left-hand corner of the room with the tongue sides facing the wall. Remove only the tongues on the long sides of all the other planks you want to lay in the first row. Using wedges, you can easily keep a gap of at least 10 mm from the wall.
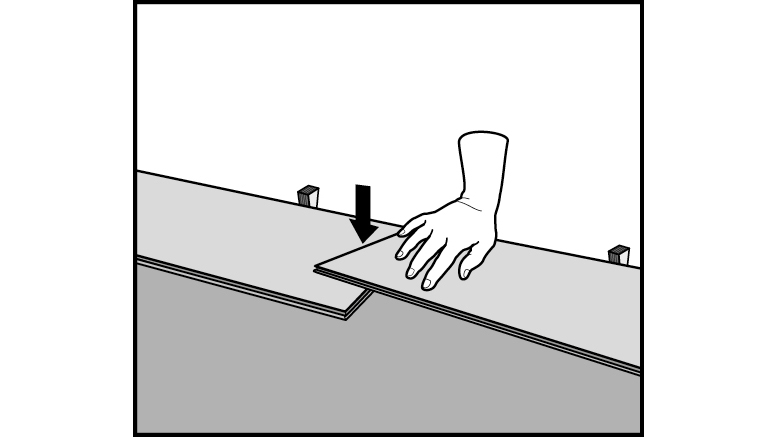
Insert the head end of the next complete plank into plank 1. Install the other planks in this row in exactly the same way across the entire width of the room.
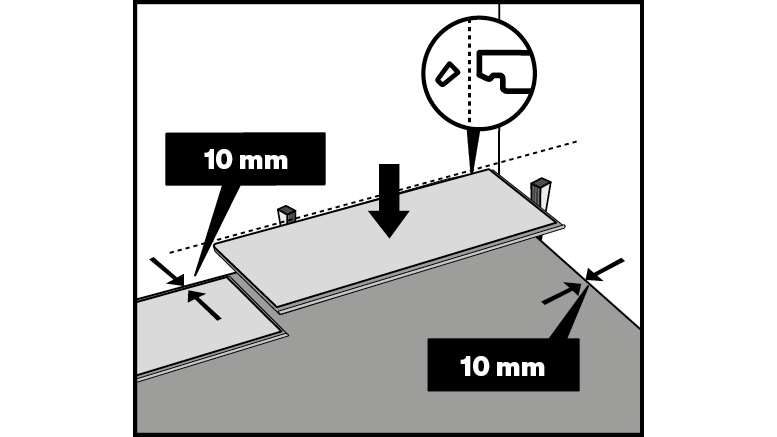
The last planks in each row are cut to size so that a gap of at least 10 mm to the wall is taken into account. You can use cut-off pieces of planks to start subsequent rows.
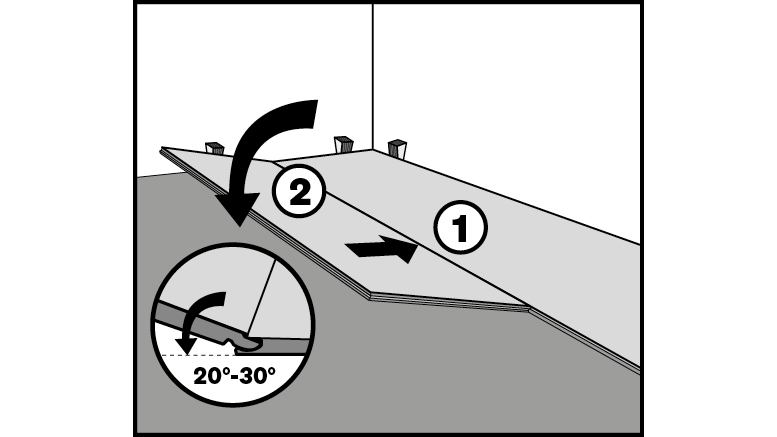
Make sure that the planks in the first row are straight. Cut the first plank in the second row down to approx. 80 cm. Angle this plank with the tongue as far as possible into the groove side of the previous row of planks and press the plank down slowly using a forward and downward turning motion. The plank has to click into the previously installed row.
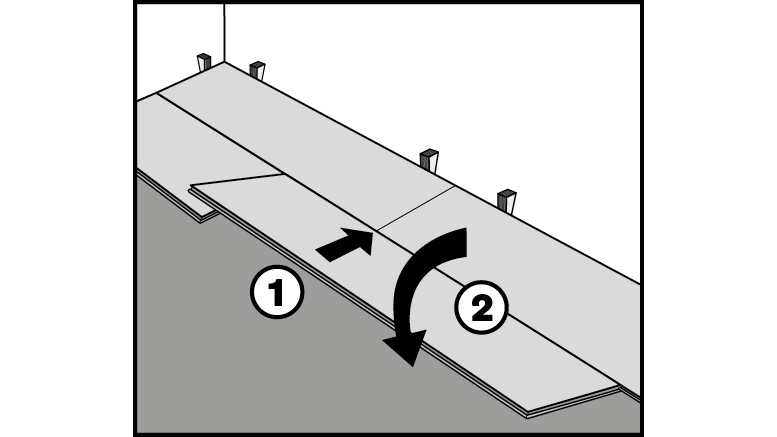
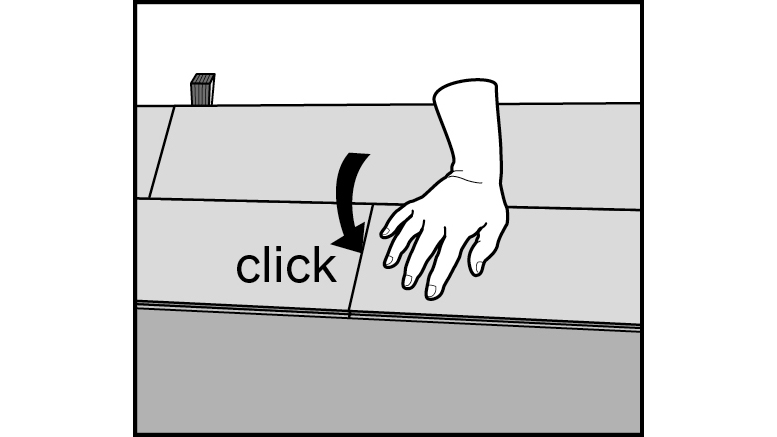
Similarly, turn the next complete plank is into the click connection on the long side and push the head end tight against the previous plank, before lowering it. Then press the plank down slowly using a forward and downward turning motion. The plank has to click into the previously installed row and the end joint with the previous plank has to be closed. Press the head end downwards until it audibly clicks into place.
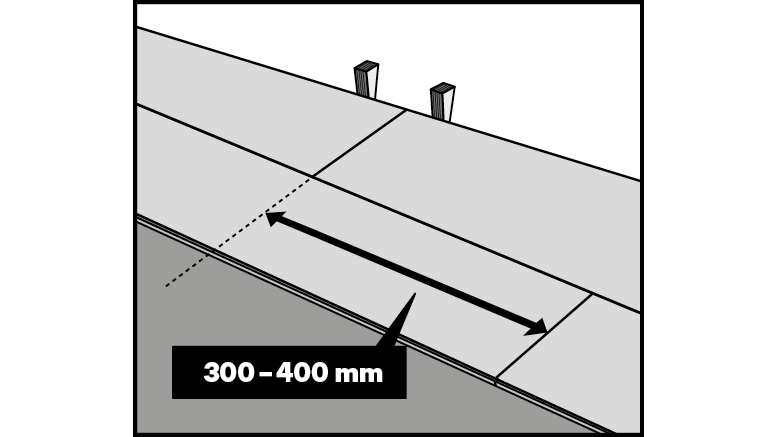
Continue laying row by row in this way. Remember that the end joints must always be offset by at least 30–40 cm.
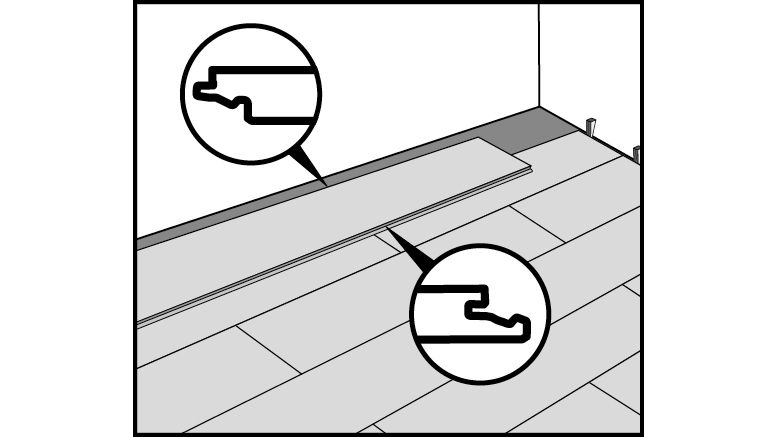
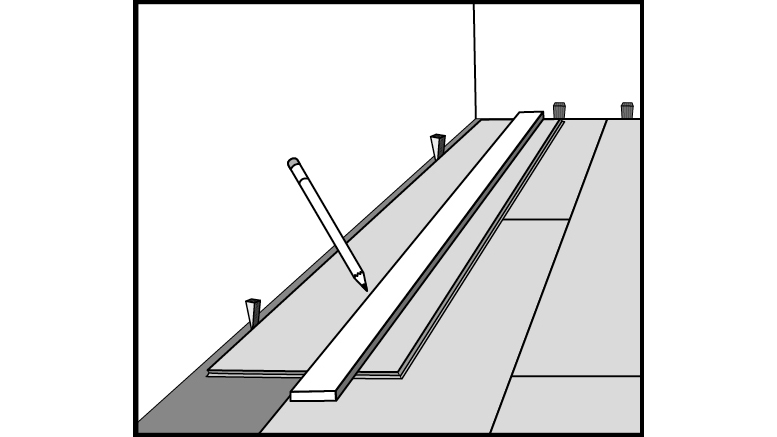
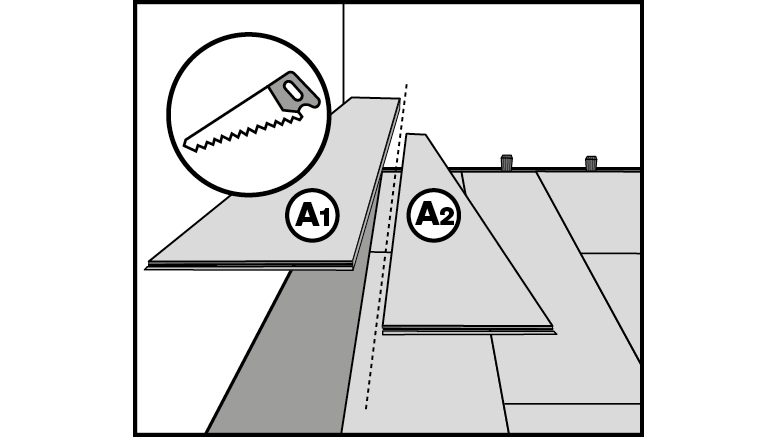
Cut the last plank in each row so that you leave a gap of approx. 10 mm to the wall. Lay the plank with the tongue side facing the wall to mark the remaining plank width.
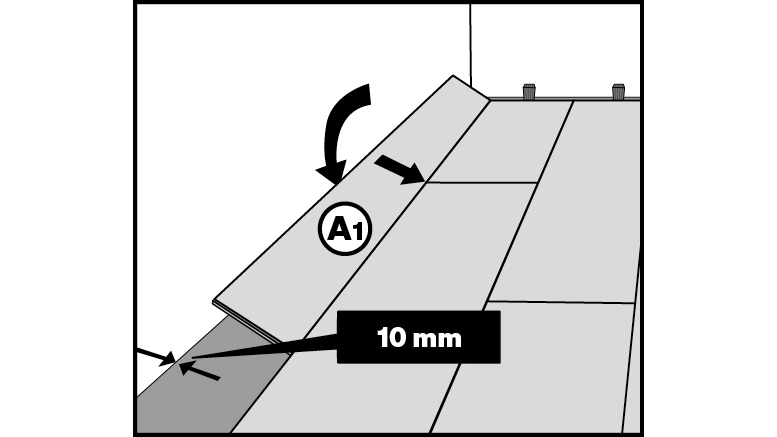
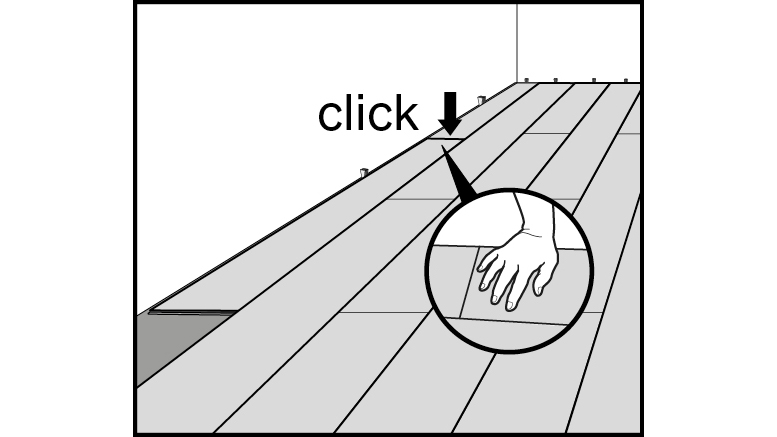
Begin laying the last row in the right hand corner of the room (leaving at least a 10 mm gap to the wall) and angle the sides of the plank into the second-last row. The next plank is angled in the same way and lowered down at the end. Press the head end downwards until it audibly clicks into place.
The specially designed Multiclic click connection allows quick and easy installation. Here, the flooring laminate flooring with click system is also installed floating without glue. Two different installation options are available to choose from.
Option 1: Angle in the short and long side;
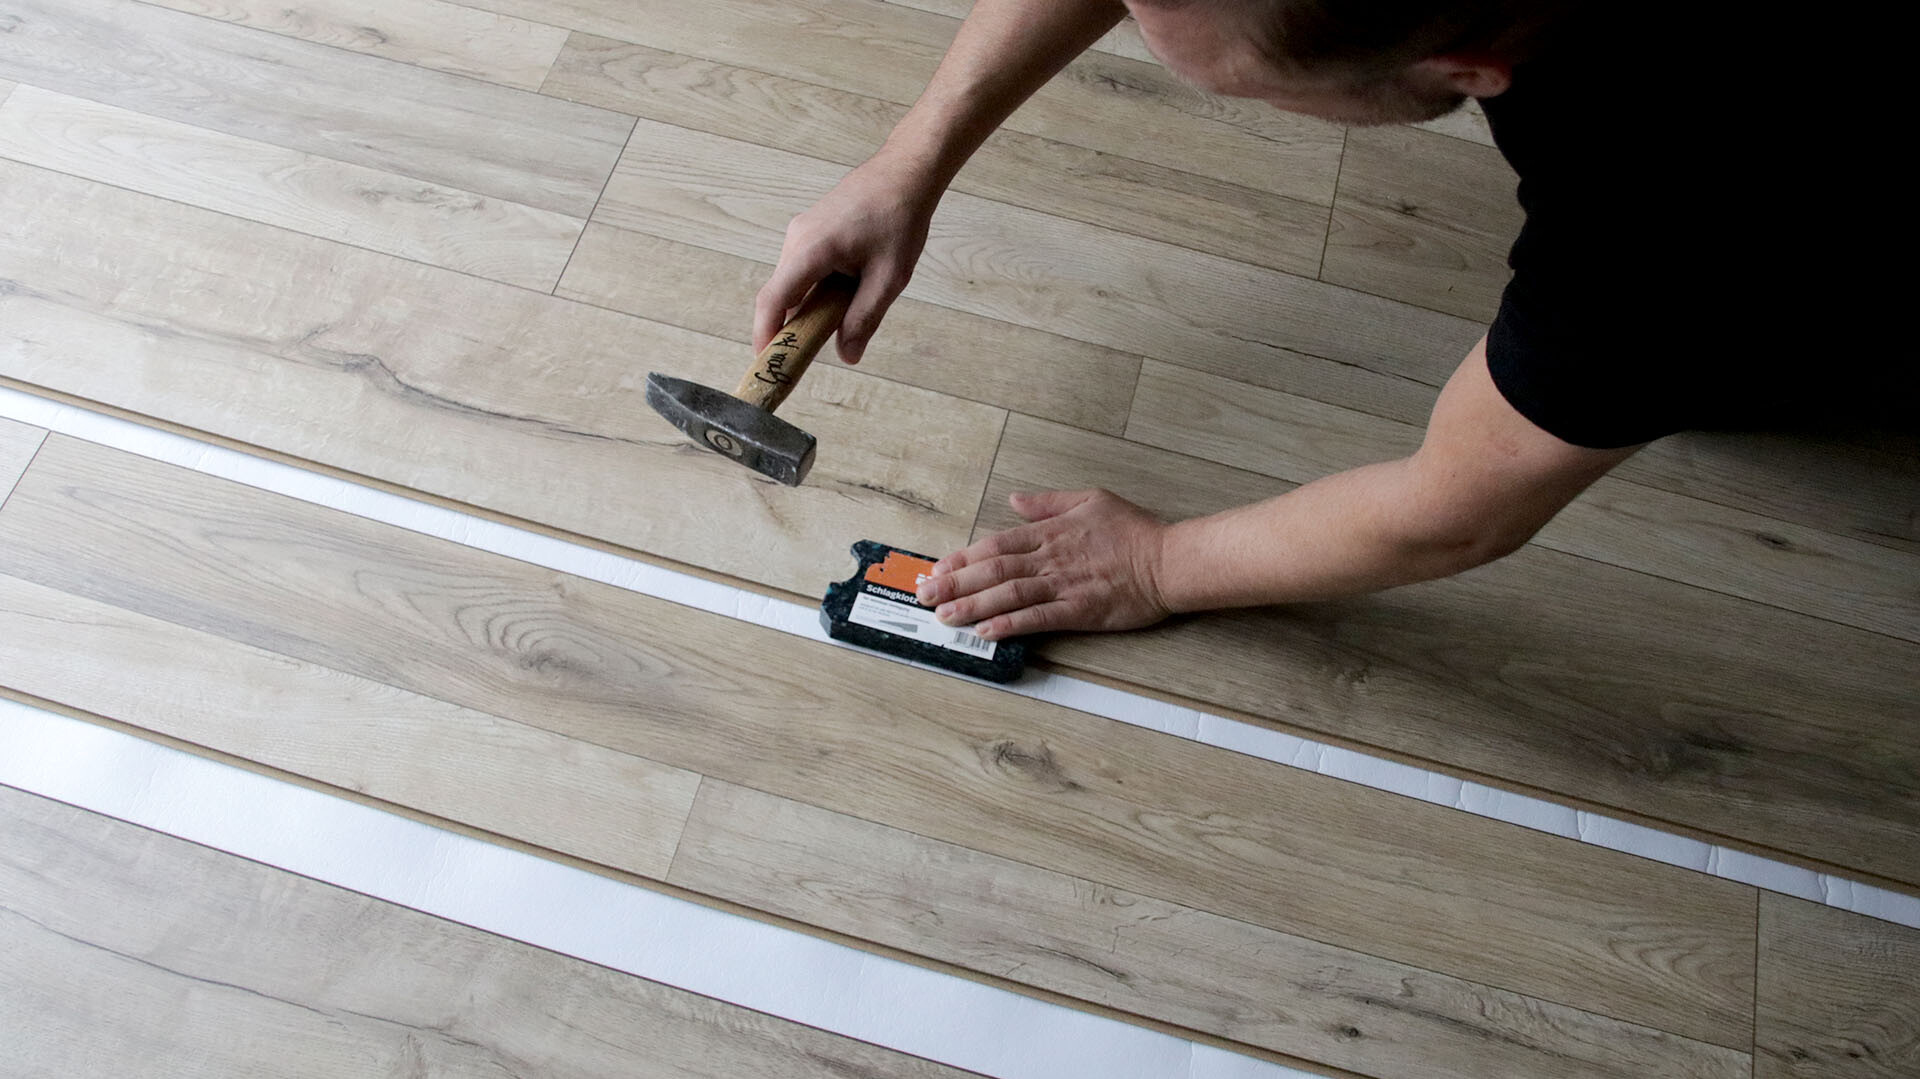
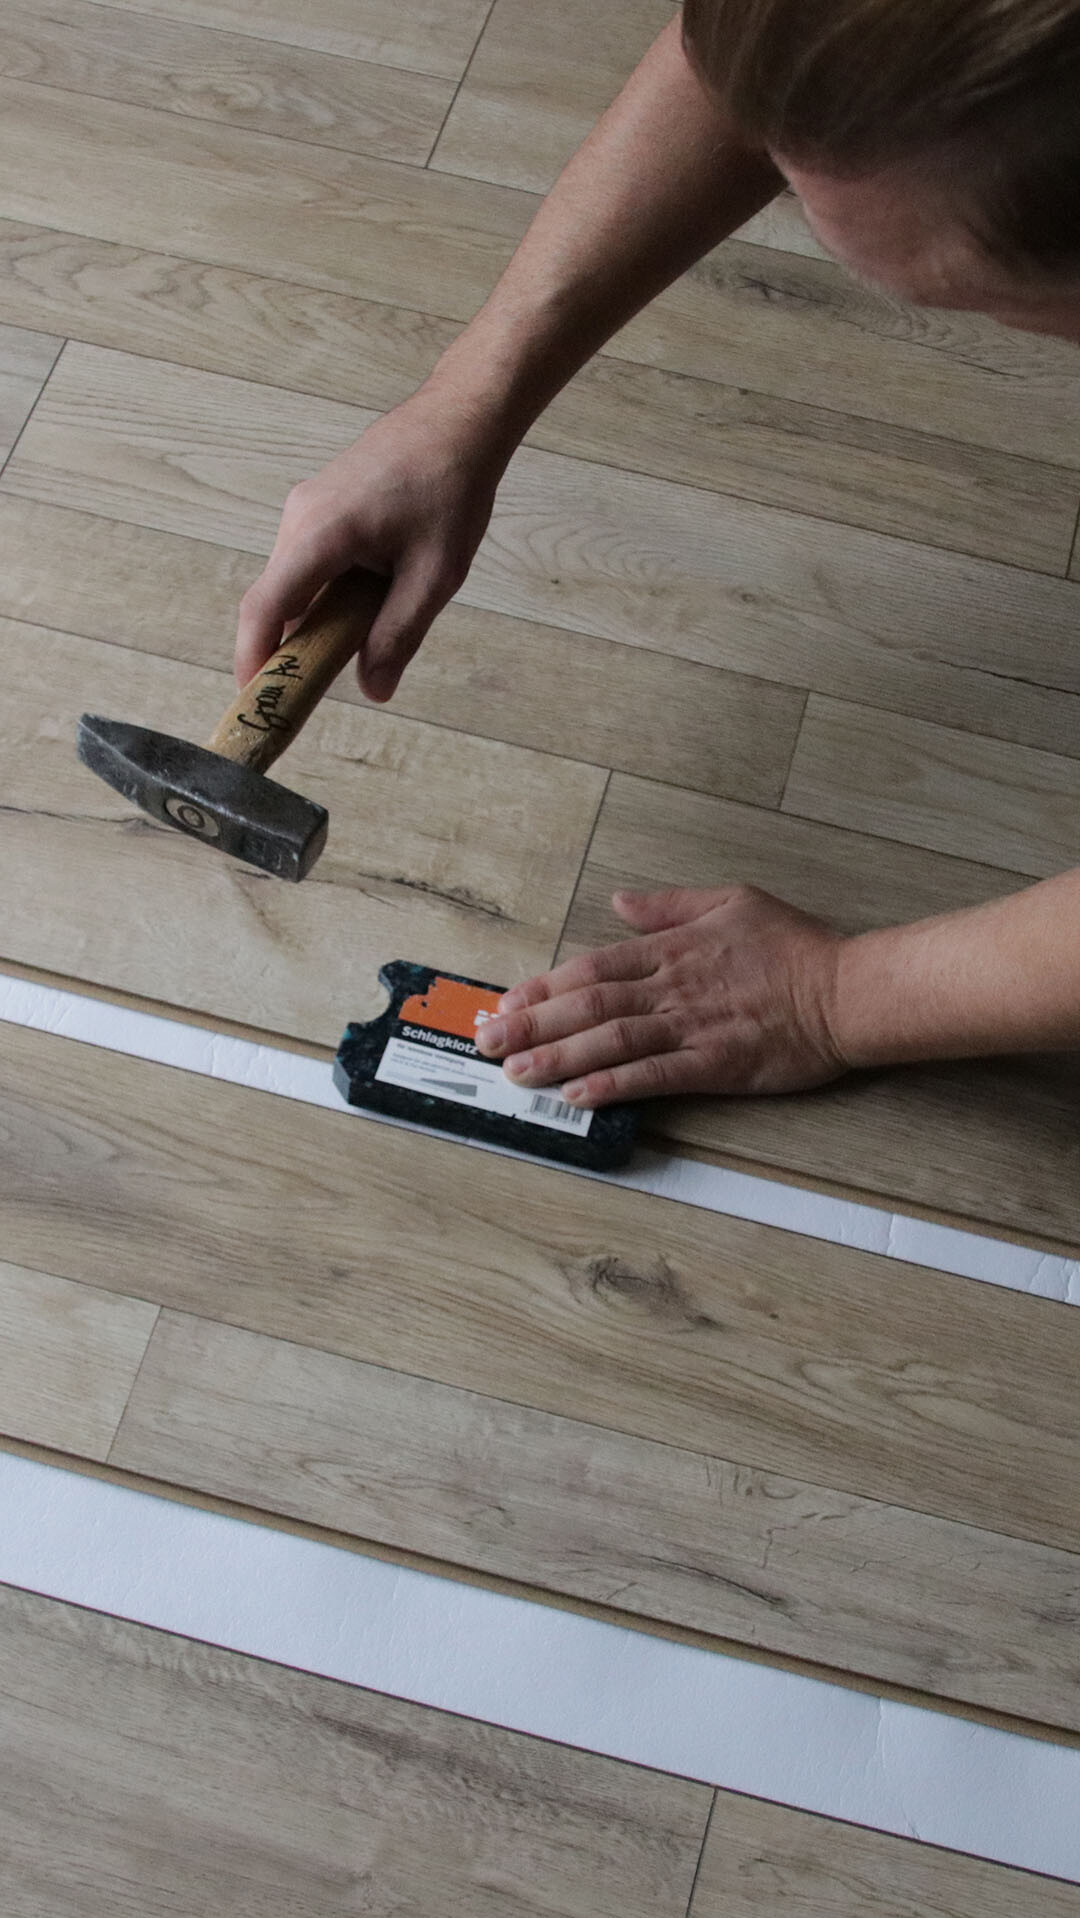
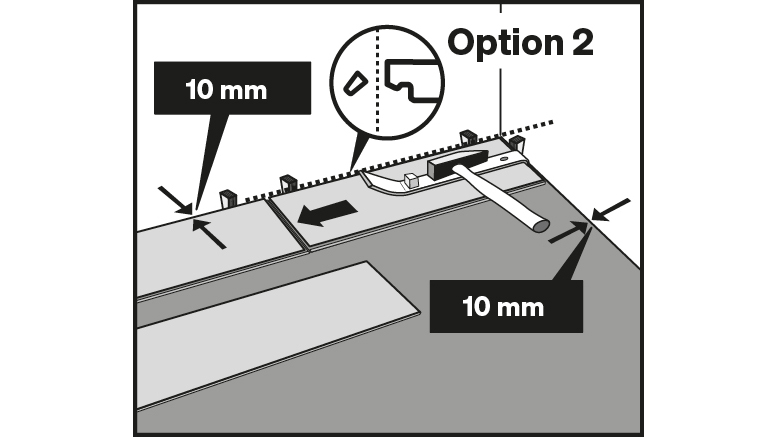
Option 2: Angle in the long side and join the short end using the MEISTER tapping block and several light taps with the hammer.
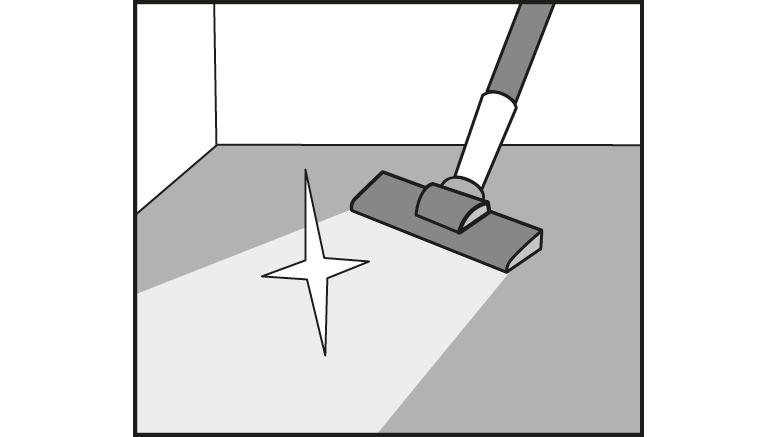
Remove any dirt, small stones, etc. from the surface prior to installation.
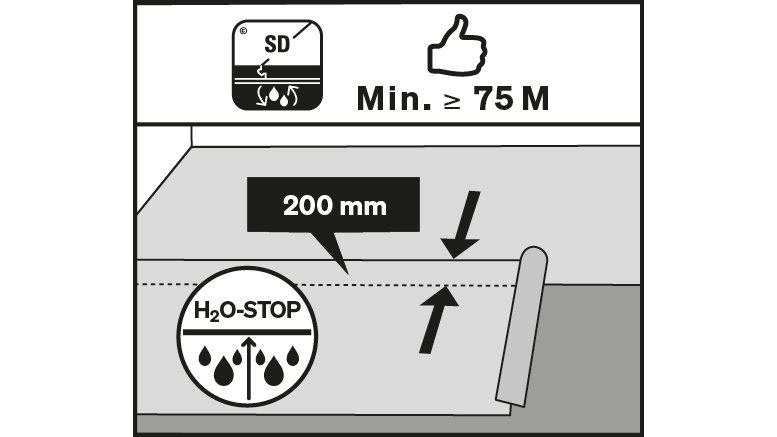
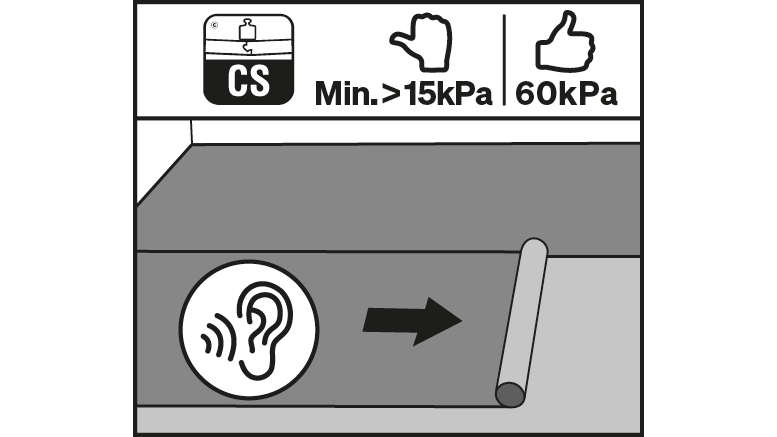
PE film measuring 0.2 mm thick must be laid out to form a ‘bath’ on all mineral subfloors (except poured asphalt screed) as a moisture-resistant barrier. The strip edges must overlap by at least 20 cm and the overlapping edges must be masked off. Alternatively, the option is available to use MEISTER insulating underlay with an integrated moisture-resistant barrier.
Lay the corresponding MEISTER insulating underlay with a pressure resistance of >15 kPa in the private residential sector or >60 kPa in the commercial sector, e.g. MEISTER Silence 15 DB.
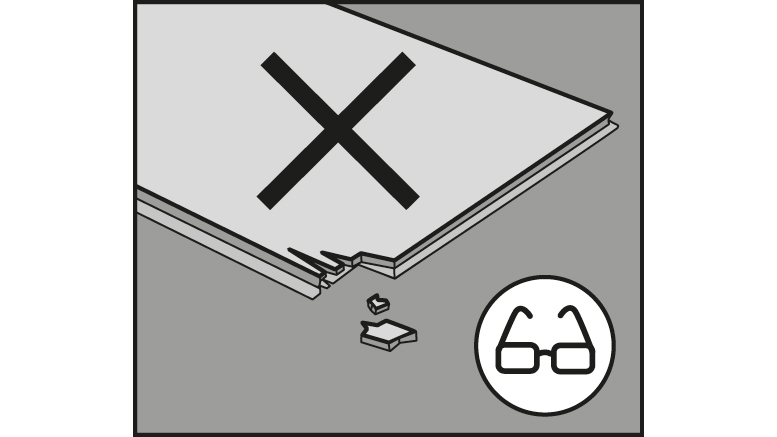
Before installation, check all planks in daylight for recognisable faults in colour and structure. No claims can be made for goods that have already been installed.
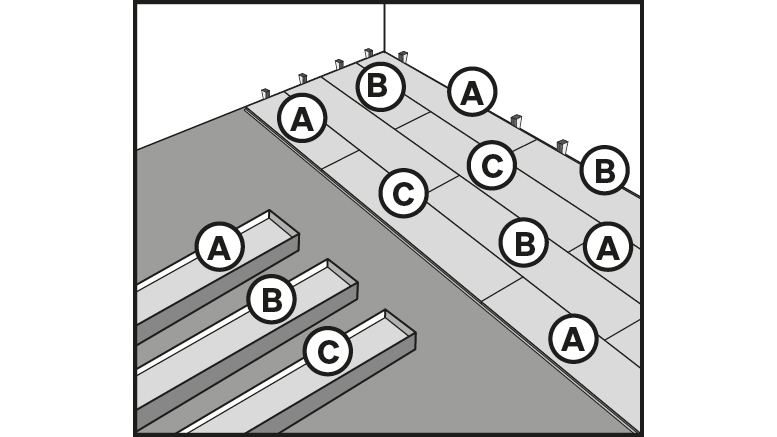
Install a mixture of planks from different packages.
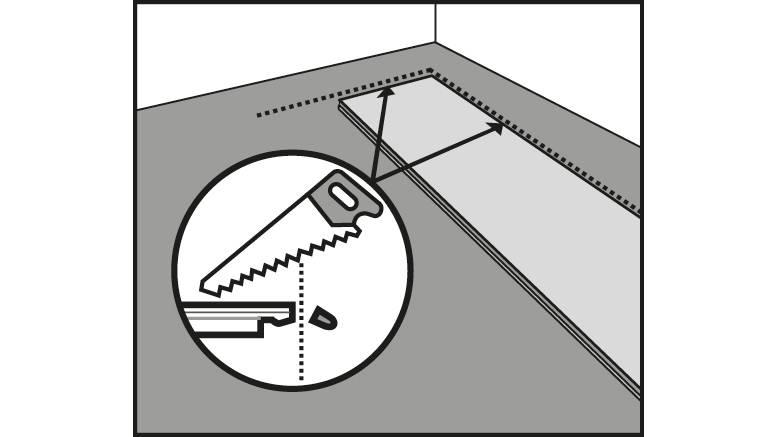
When sawing the elements, make sure you work from the correct side: if you use a bench saw, keep the decorative side facing up, if you use a keyhole or portable circular saw, keep the decorative side down. Start by laying the first complete plank in the left-hand corner of the room with the tongue sides facing the wall. Saw the tongues off the first plank, both on the short and the long side. Remove only the tongues on the long sides of all the other planks you want to lay in the first row.
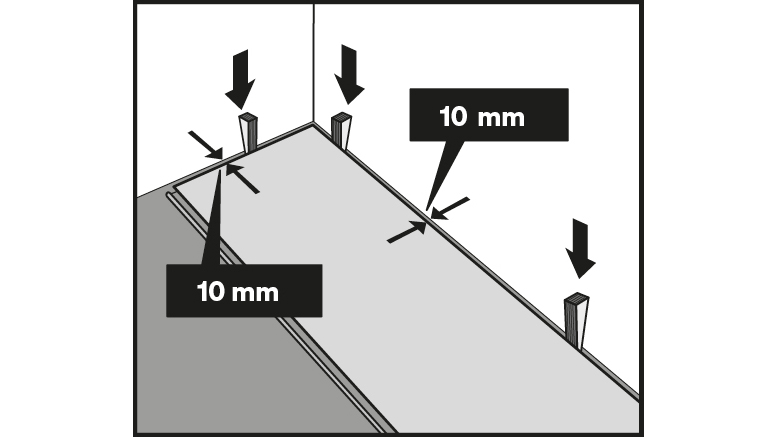
Using wedges, you can easily keep a gap of at least 10 mm from the wall.
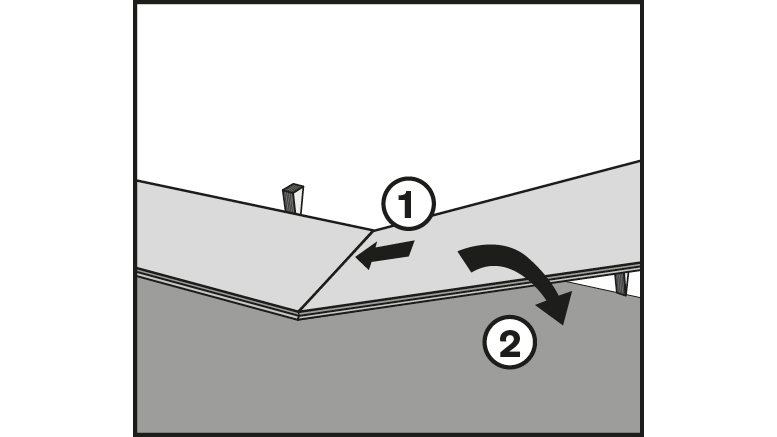
Angle the short end of the next complete plank into plank 1. Install the other planks in this row in exactly the same way across the entire width of the room.
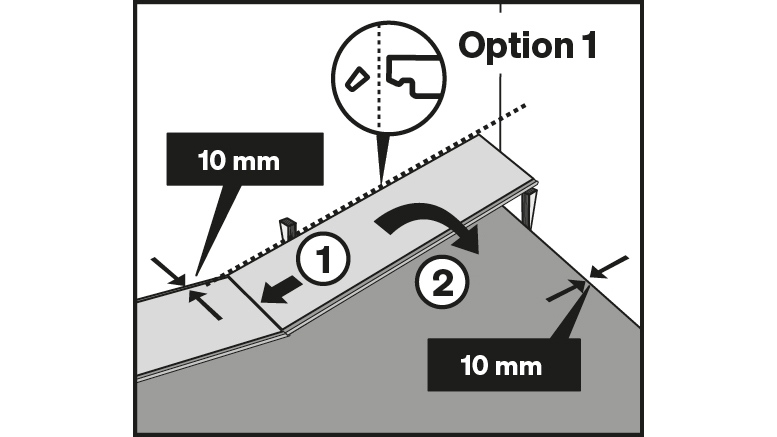
The last planks in each row are cut to size so that a gap of at least 10 mm to the wall is taken into account. You can use cut-off pieces of planks to start subsequent rows.
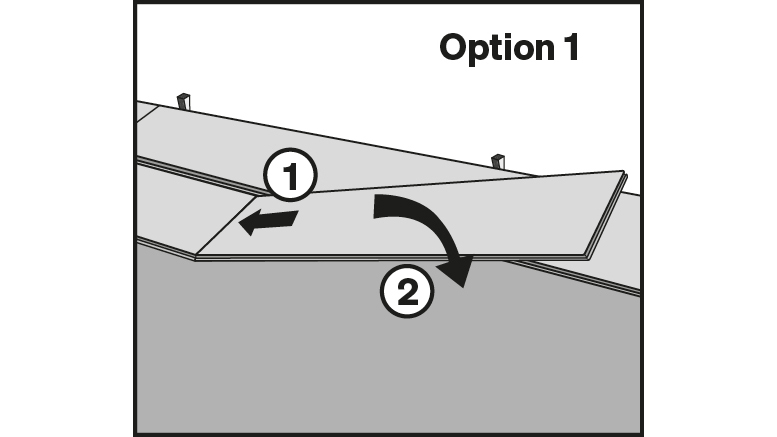
Angle in the short and long side.
Make sure that the planks in the first row are straight. Cut the first plank of the second row down to approx. 80 cm.
Angle the short end of the next complete plank into the previous plank.
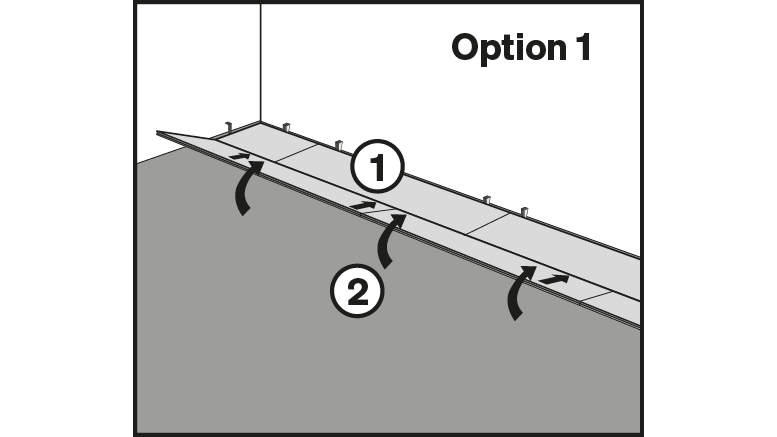
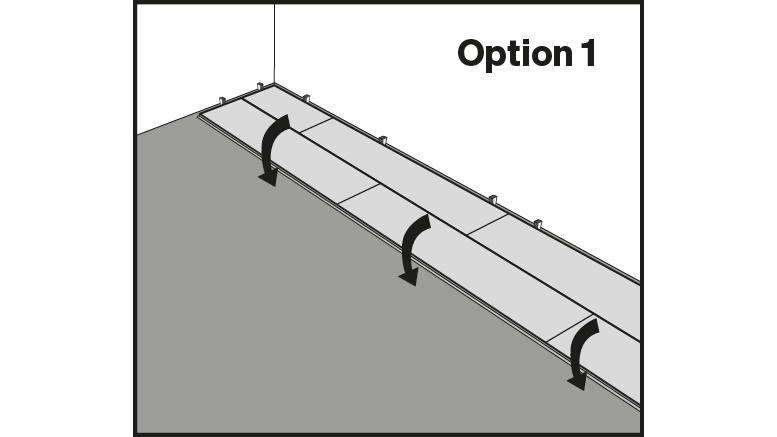
Once you have angled in all of the planks in a row, angle them into the previously laid row and press them down slowly using a forward and downward turning motion. The row of planks should click into the previously installed row. Alternatively, you can angle in the short end of each individual plank first and then connect the long side by slightly raising it and angling it into the previous row. Continue the installation row by row in this way.
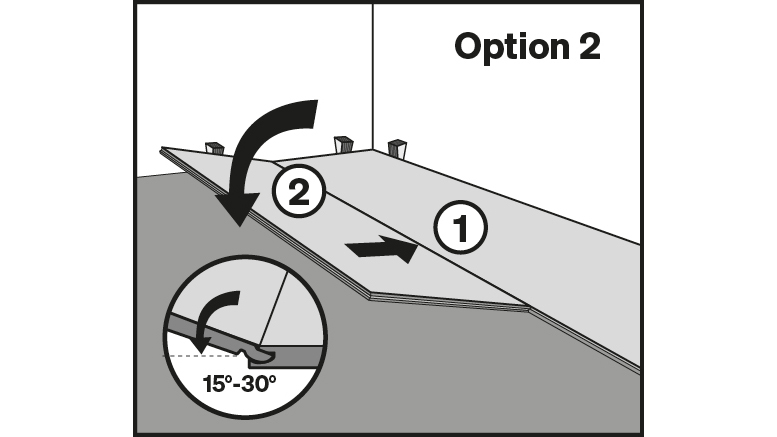
Angle in the long side and join the short end using the MEISTER tapping block and several light taps with the hammer.
Cut the first plank of the second row down to approx. 80 cm. Angle this plank with the tongue into the groove side of the previous row of planks and press the plank down slowly using a forward and downward turning motion. The plank should click into the previously installed row. Again, angle the next complete plank in the second row first on its long side against the previously laid row. Make sure the long joint is always tight.
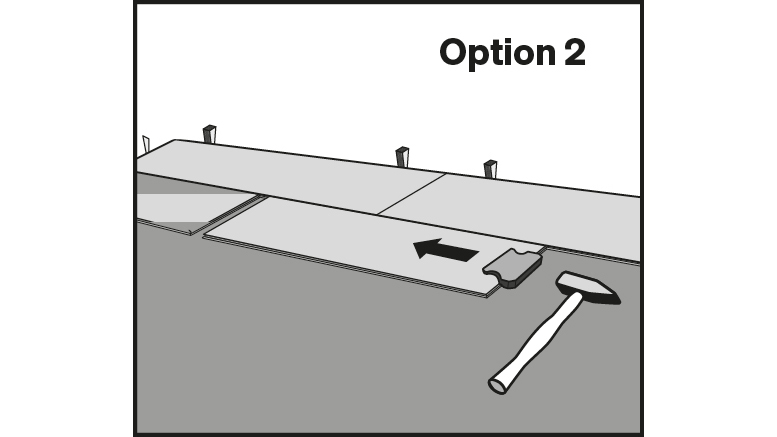
Once you have angled in the plank so it lies flat on the subfloor, click the head ends together using the MEISTER tapping block and light taps with the hammer. Continue the installation row by row in this way.
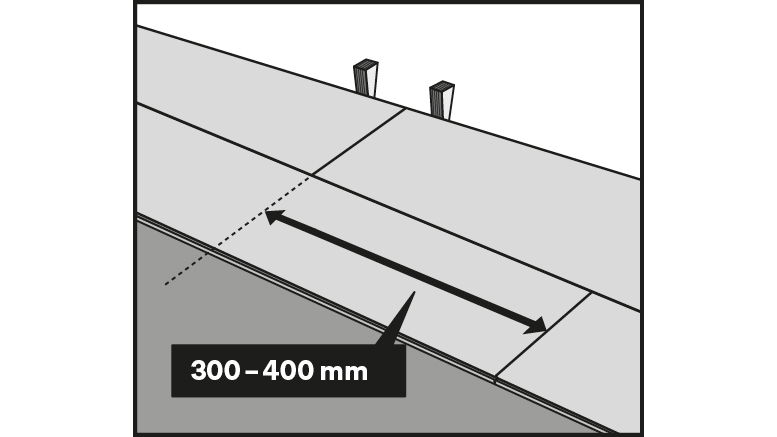
Remember that the short-end joints must always be offset by at least 30–40 cm.
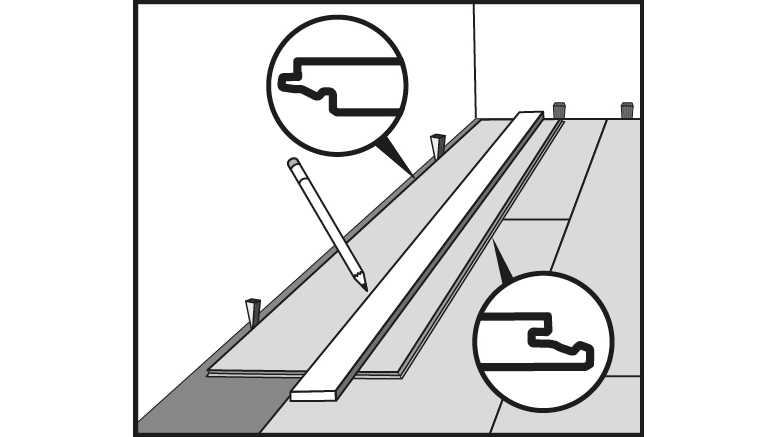
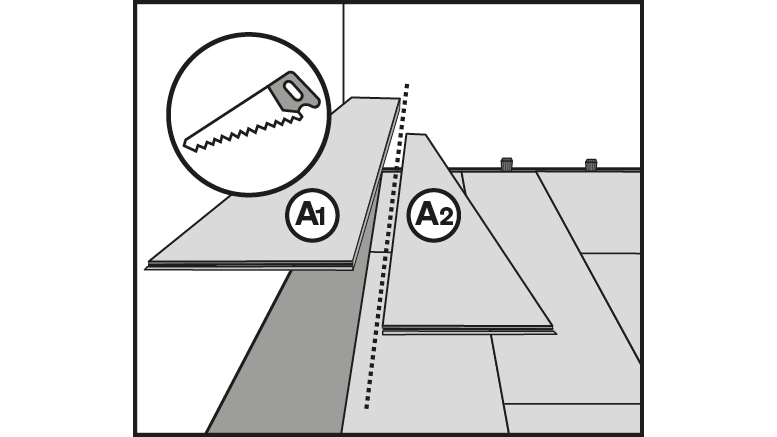
The last planks in each row are cut to size so that a gap of at least 10 mm to the wall is taken into account. Lay the plank with the tongue side facing the wall to mark the remaining plank width.
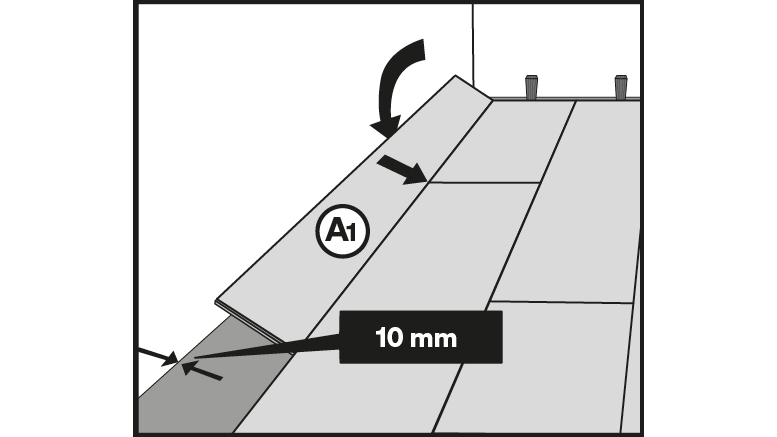
Start by laying the last row in the right-hand corner of the room and angle the long side of the plank into the second-last row.
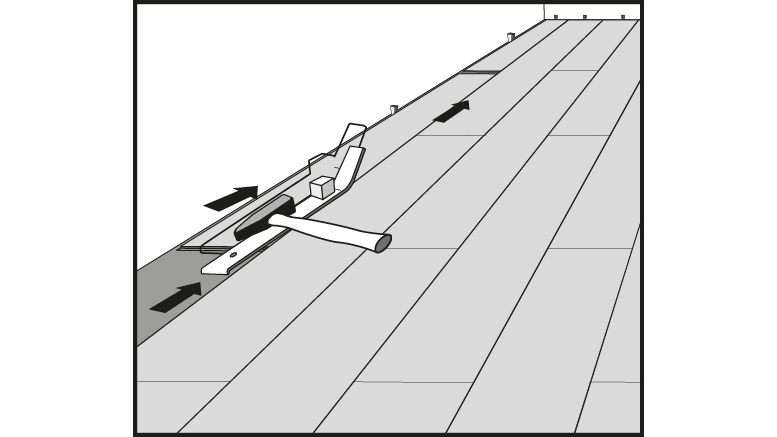
The next plank is angled in along the long side and lowered down in the same way. The shortend connection is then established with the help of a heel bar and several light taps with the hammer.
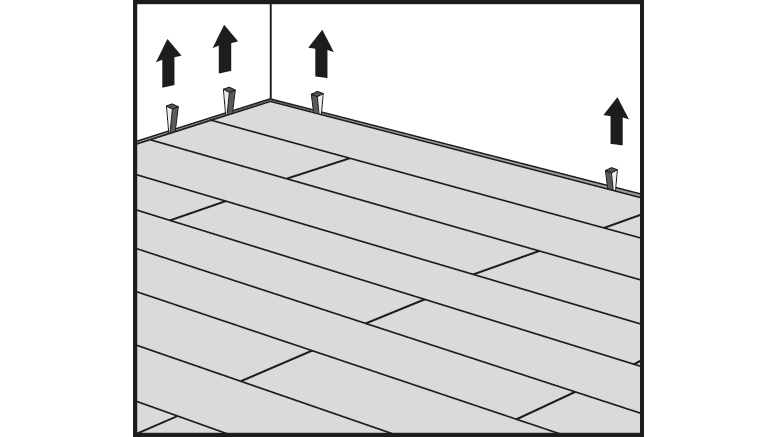
Remove the wooden wedges along the wall.
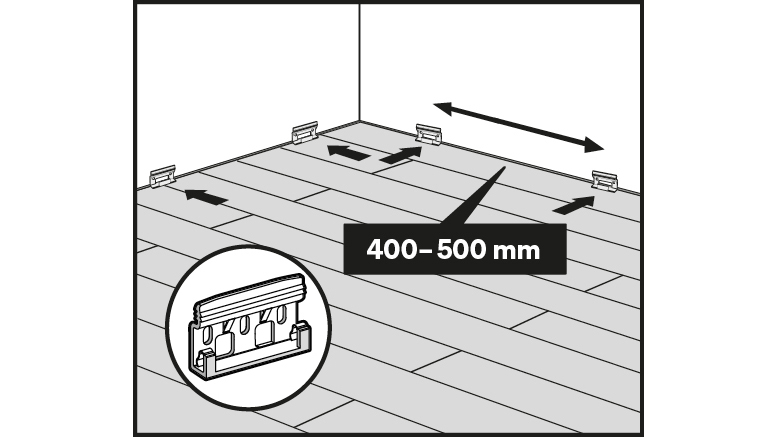
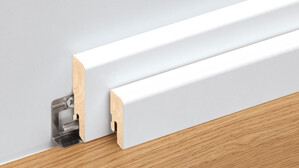
Screw the skirting board clips to the wall at intervals of 40–50 cm. To ensure that the skirting board fits tightly, do not position it on an uneven wall.
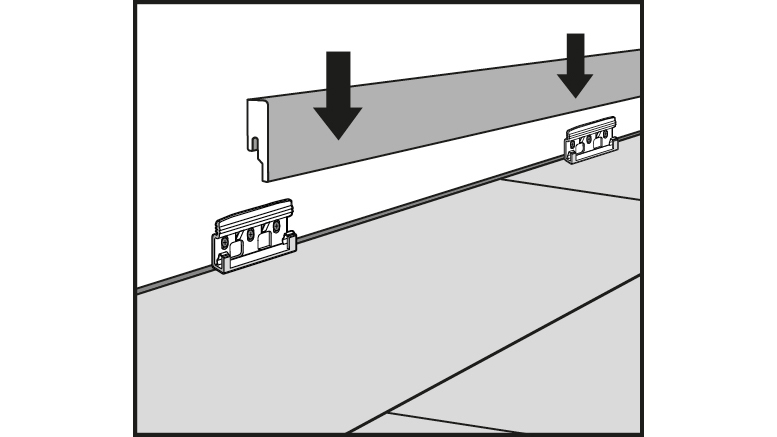
The skirting board is placed on the clip from above and pressed down. For the length joints of the mouldings, the clip is placed on the joint with a half overlap to ensure a good hold. Please avoid bringing any silicone products into contact with the mouldings.
We offer extensive accessories to go with our skirting boards, including fixing clips, corner systems, connecting pieces and end caps. An overview can be found here: accessories for mouldings.
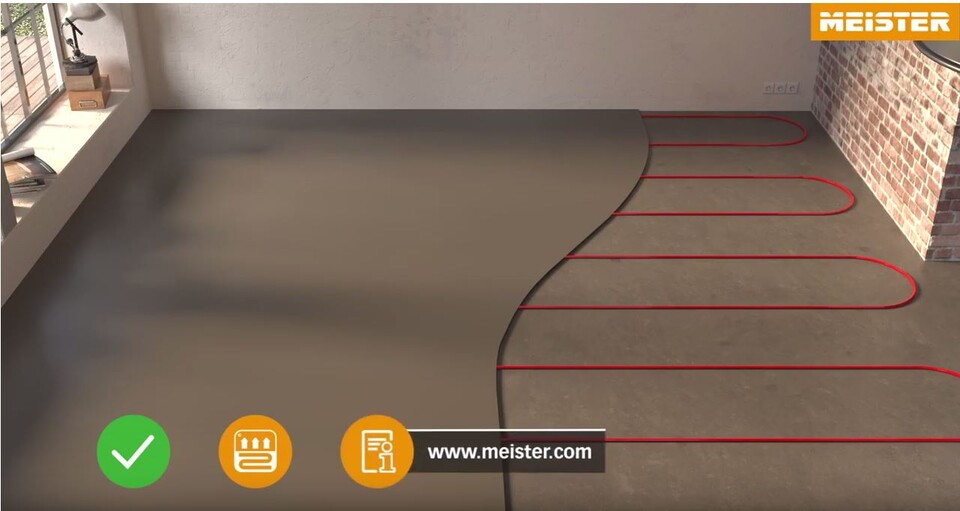
Whether a new build or an extension: Hot water underfloor heating systems are becoming more and more popular because underfloor heating is a particularly cosy form of heating and radiators, which are not very appealing to the eye, are no more. Just like our parquet flooring, MEISTER laminate flooring is perfect for installing over a regulated hot water underfloor heating system. MEISTER laminate flooring has - particularly when combined with suitable underlay material – a very low thermal resistance. That is important such that as much heat as possible can enter the room easily.
What tips are important to consider when laying underfloor heating? The screed must be completely dry and the residual moisture content of cement screed and anhydrite screed must not exceed 1.8% and 0.3% respectively. The laying process is the exact same as installations without underfloor heating. Ensure that the humidity ranges between 35 and 65%. After MEISTER parquet flooring has been installed, the maximum surface temperature of 29°C may not be exceeded.
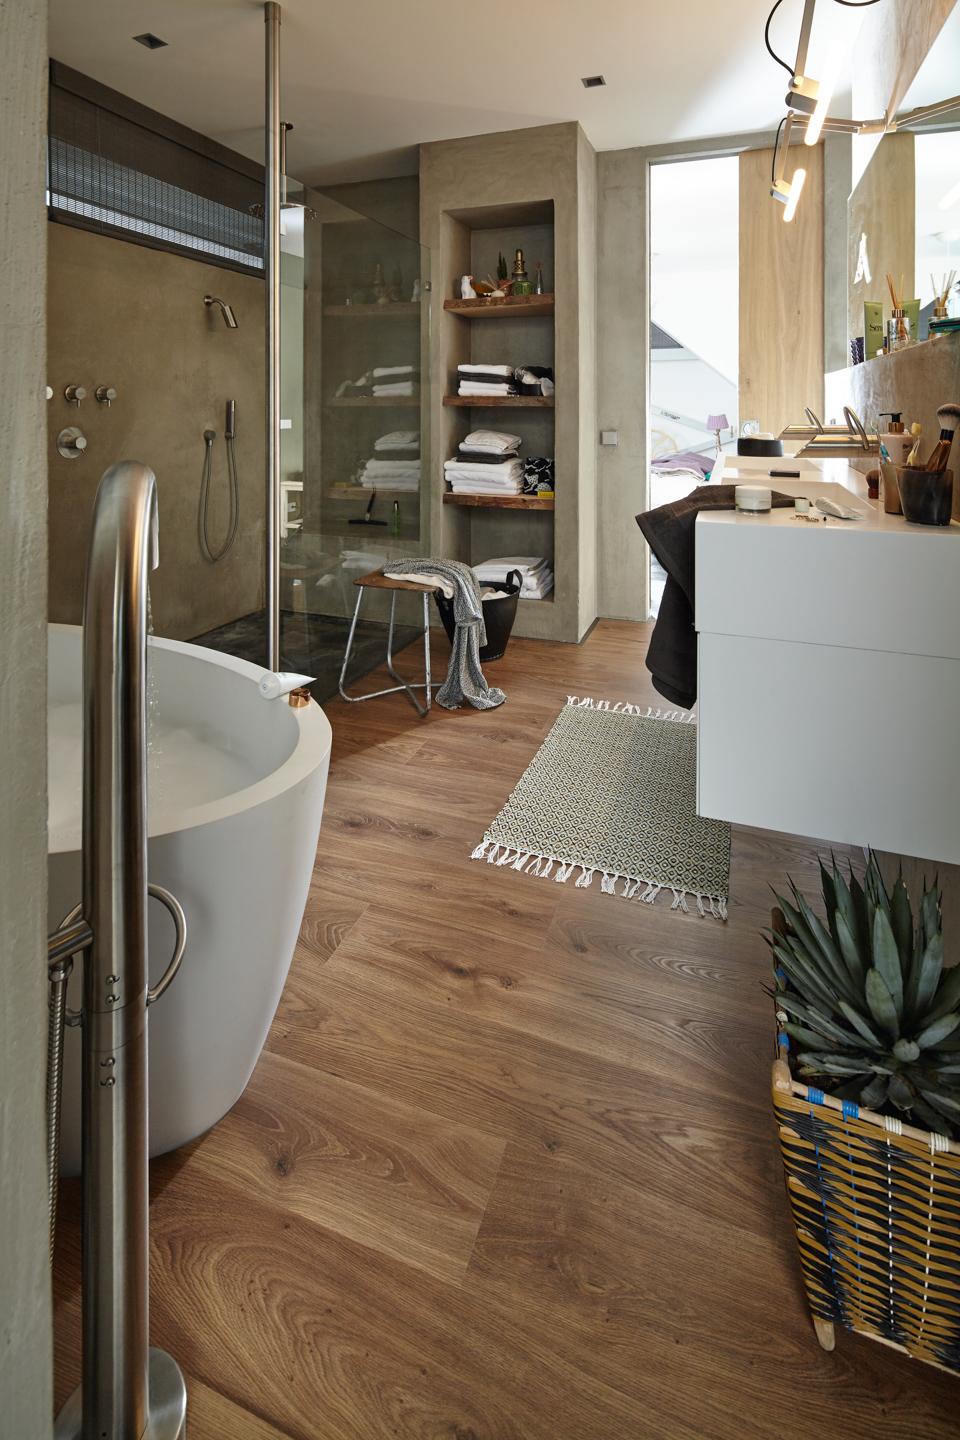
All of the premium laminate flooring available at MEISTER are suitable for floating bathroom floors as they are fitted with an AquaSafe system. Yet care must be taken to ensure that no humidity gets under the flooring. Ultimately, laminate flooring is mainly made from wood. You should therefore ensure the following when laying laminate flooring in your bathroom:
Wall ends and edge areas should preferably be fitted with suitable end, transition or joining profiles made of aluminium. To ensure the necessary seal against liquids, a pre-compressed PE sealing tape without plasticisers can be attached, for example. This tape is glued under the cover profile. Once this has been screwed to the base profile, the result is a sealed finish with the flooring. The bottom profile must be glued to the adhesive and sealing tape of the respective sound-absorbing cushion. Joints between the profile and the wall must
be sealed water-impermeably using a permanently flexible sealing compound (plasticiser-free silicone). This also applies to the wall and edge areas where none of the aluminium profiles above can be used. In such areas, a PE joint filler cord (plasticiser-free) must be used to finish off. These expansion joints must also be sealed with
sealing compound to prevent humidity penetration.
Should you have any further questions, we would recommend you read the manufacturer’s detailed instructions that are enclosed with each packet. You will find here all the key information required for laying laminate flooring.
