
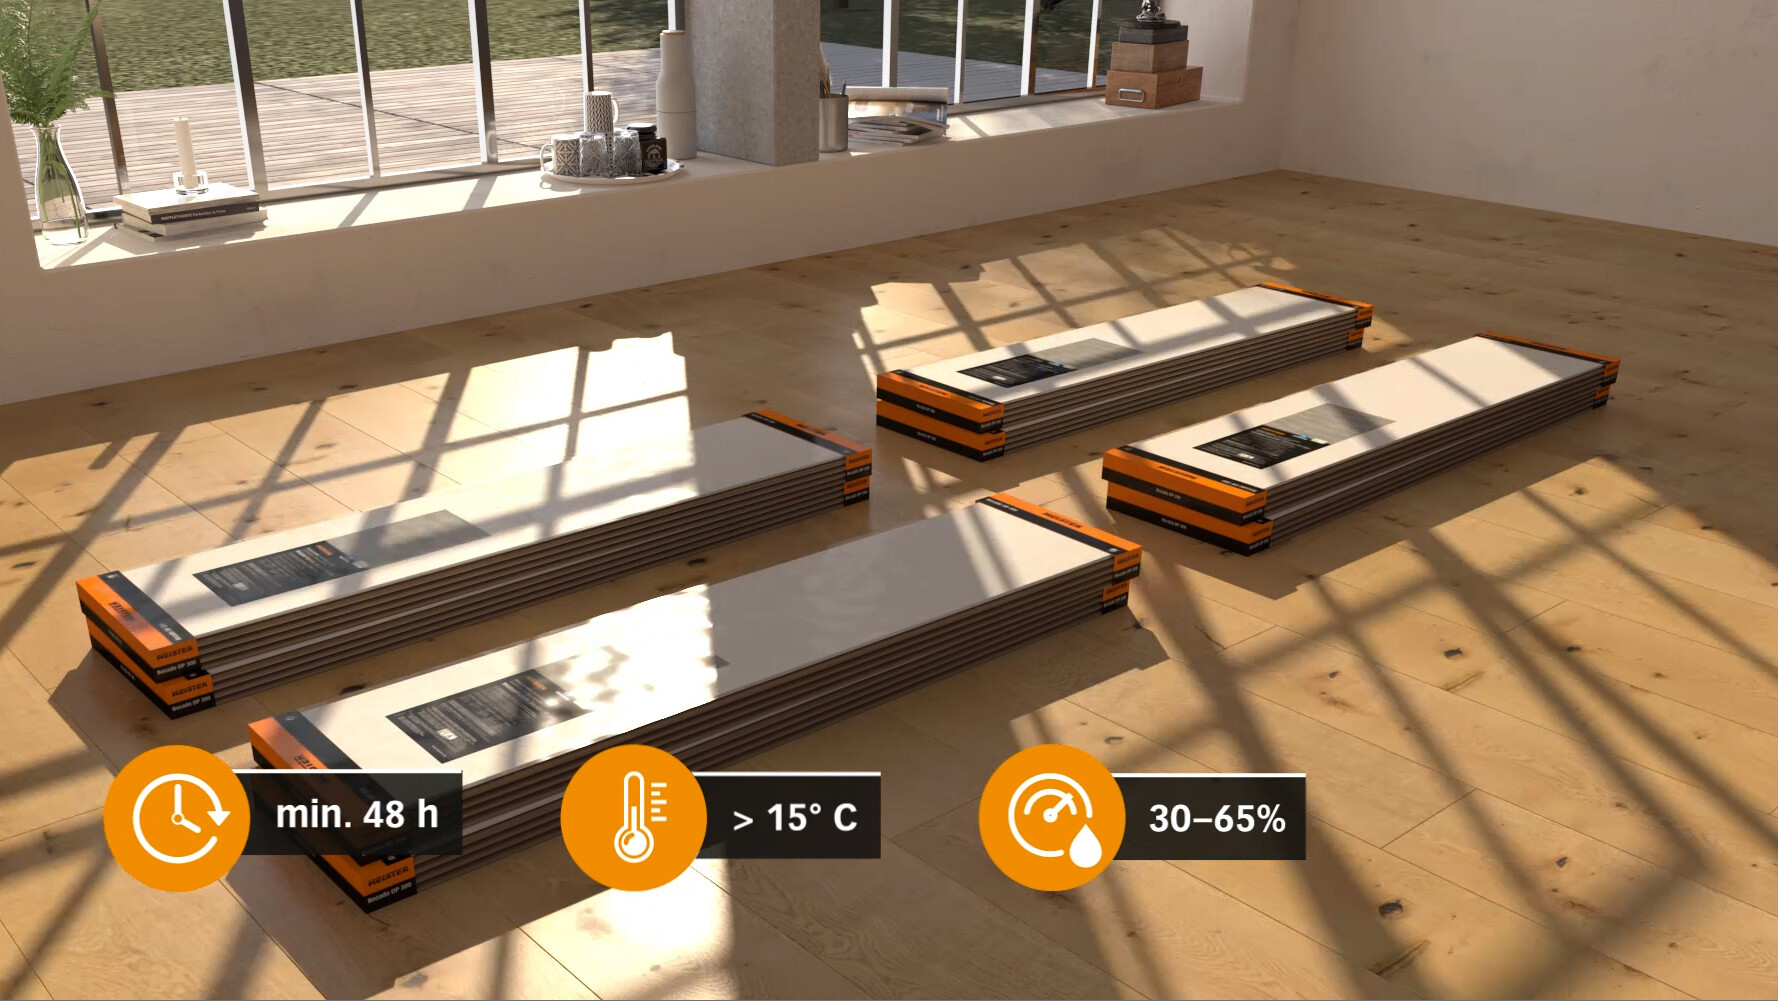
It is important to acclimatise the panels before laying them. Store them unopened for approx. 48 hours in the centre of the room in which you want to lay them. The room temperature must be approx. 20°C (at least 15°C), and the relative humidity must be approx. 30–65%.
Make sure that the walls and ceilings are dry, i.e. contain a maximum residual moisture of 5%.
As the wall panels and ceiling panels are only suitable for indoor use, you should refrain from using them in home conservatories or skylight linings due to high incidence of sunlight and the associated temperature fluctuations. Do not expose the decorative panels to long-term temperatures of over 110°C (e.g. ceiling spotlights or heating).
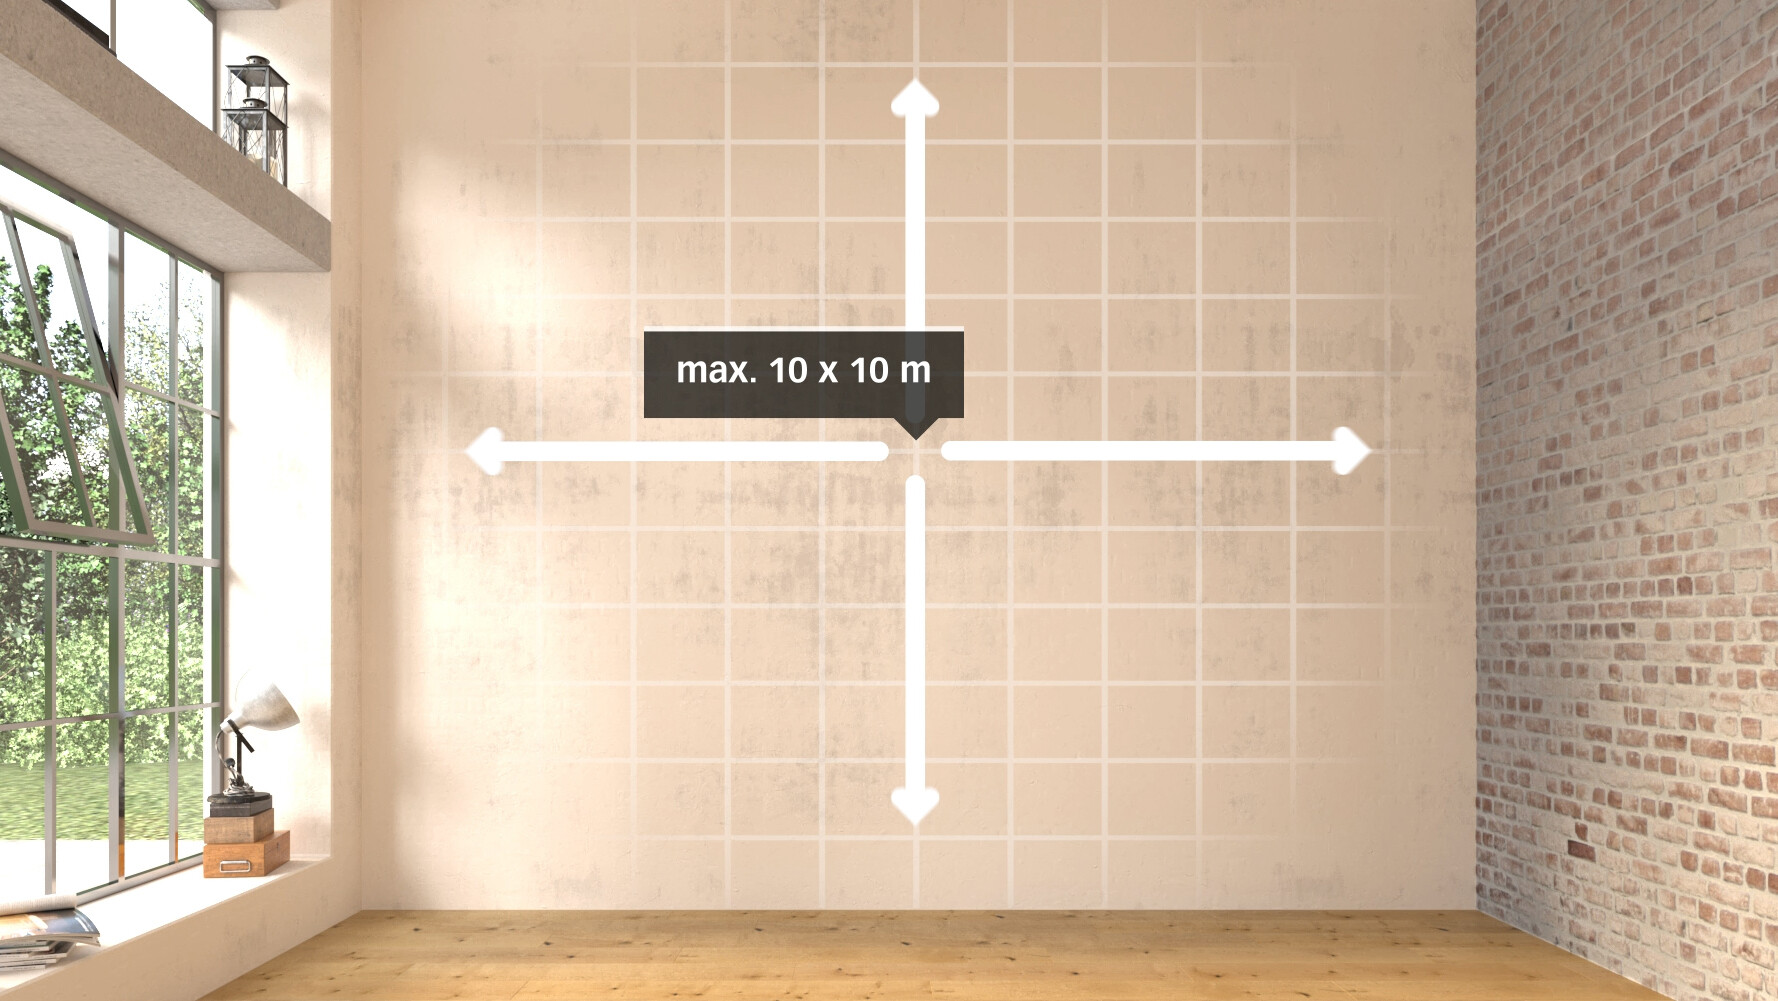
If your installation surface on the wall or ceiling is longer or wider than 10 metres, you need an expansion joint. This should be covered with border moulding in matching colours. It is also important during installation that you allow a gap of at least 10–14 mm next to all walls and other fixed elements.
During installation, make sure that air can also circulate behind the wood panelling (possibly provide batten backing structure). It is important to avoid trapped air!
The humid room panels from MEISTER are not suitable for use in areas directly exposed to splashing water. This means they must not be installed in areas such as showers or home swimming pools. It is essential to ensure air can circulate behind the wood panelling! When working in humid rooms, only use assembly parts that are protected against corrosion.
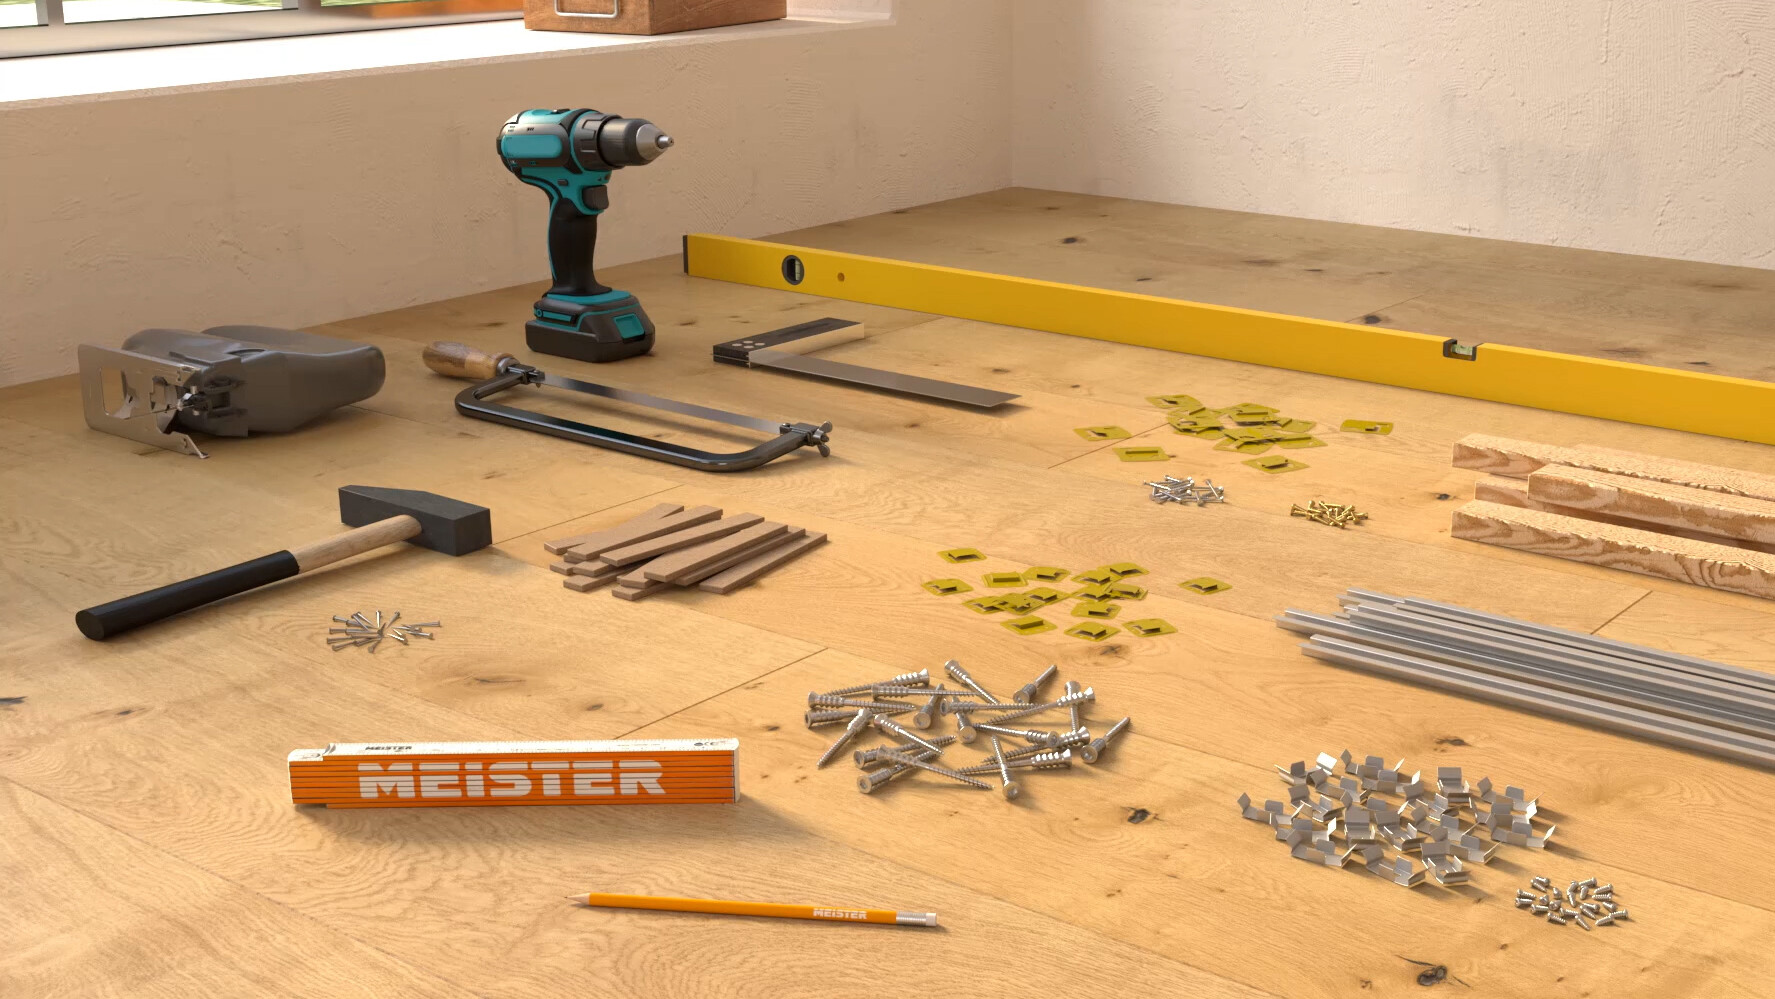
Fixing material:
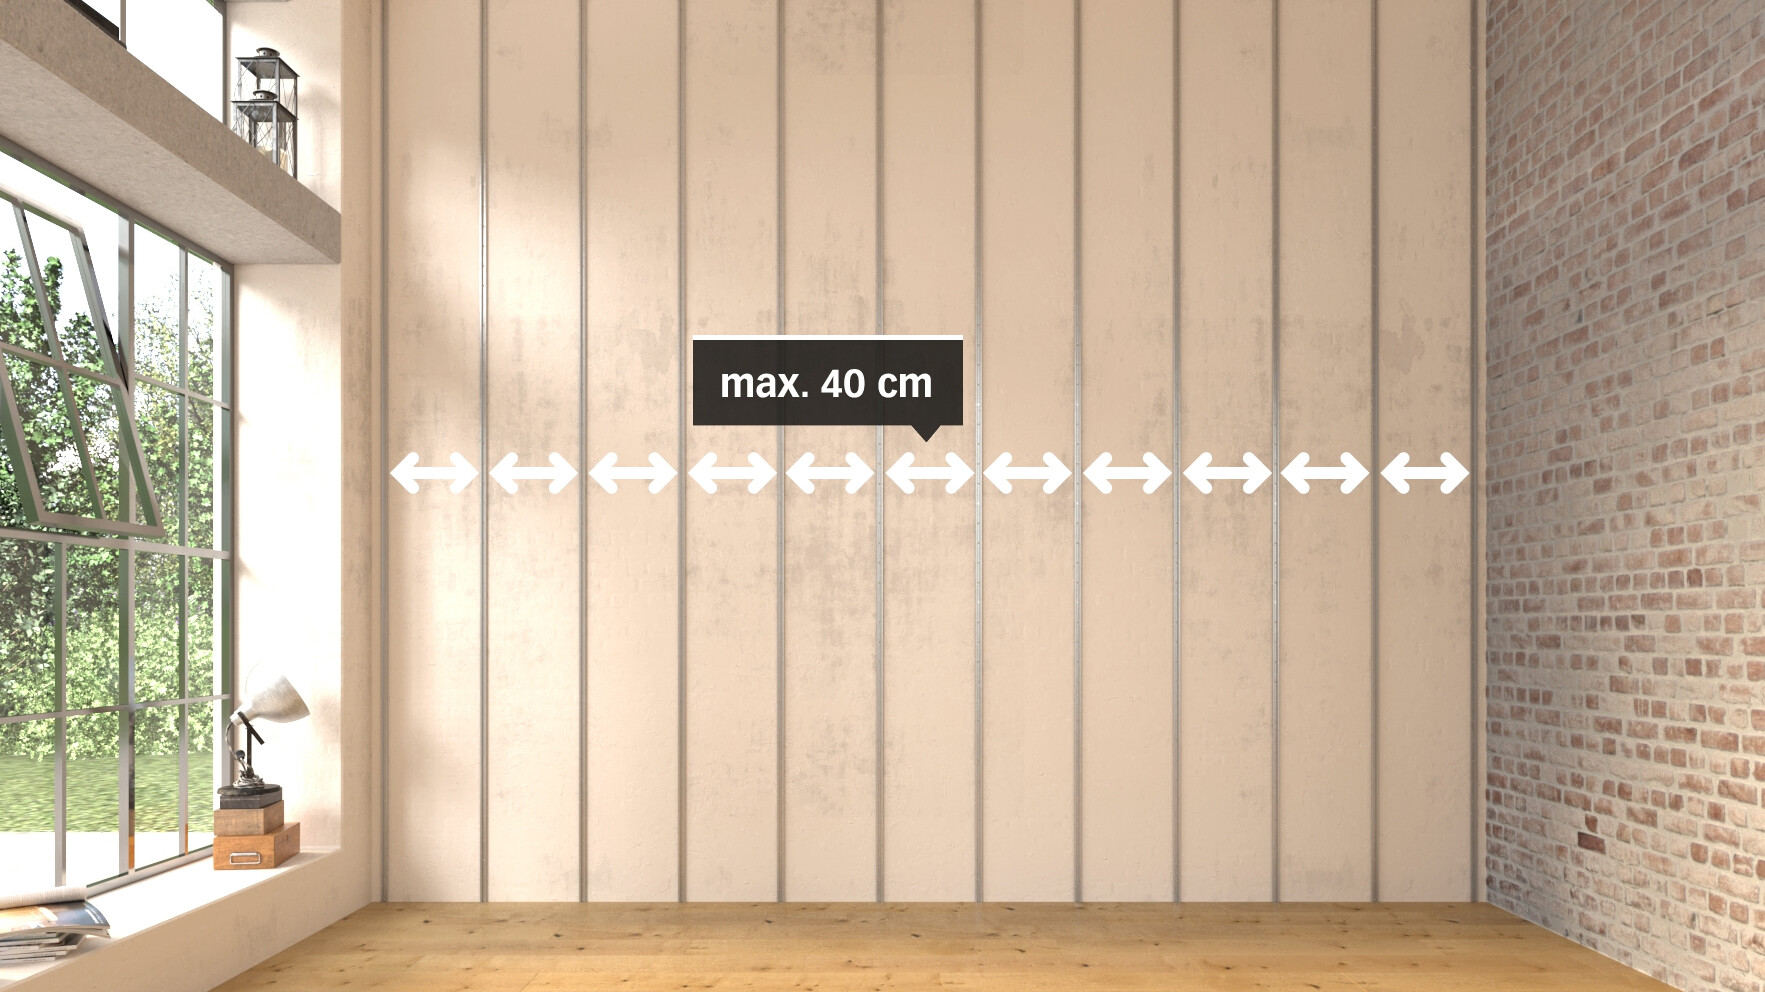
The Type 8 batten profile can also be used with the Top 15 fixing clip for attaching real wood and decorative panels. This does NOT apply to MeisterPanels. tertio DP 250 and DP 200!
Place the Type 8 batten profile at maximum intervals of 40 cm apart (fig. 1). The profile is mounted crossways to the panel length and fixed so that there is an even sub-structure. Please use suitable plugs or screws to screw the sub-structure to the raw ceiling or wall at intervals of 40–50 cm. Correct any slight unevenness in the wall or ceiling by placing spacers or wooden wedges underneath the battens. Use a standard metal hacksaw or one-hand angle grinder with metal cutting disc to trim the profile. When using the Type 8 batten profile, it must be noted that a minimum gap of 20 mm is required when installing MEISTER recessed lights. This must be ensured by fixing the profile to the wall/ceiling using a spacer of at least 12 mm.
To avoid damaging the surface of the wall panels and ceiling panels, be sure to note the following when sawing the elements: The decorative side should be face up when using a bench saw or face down when using a jigsaw or hand-held circular saw.
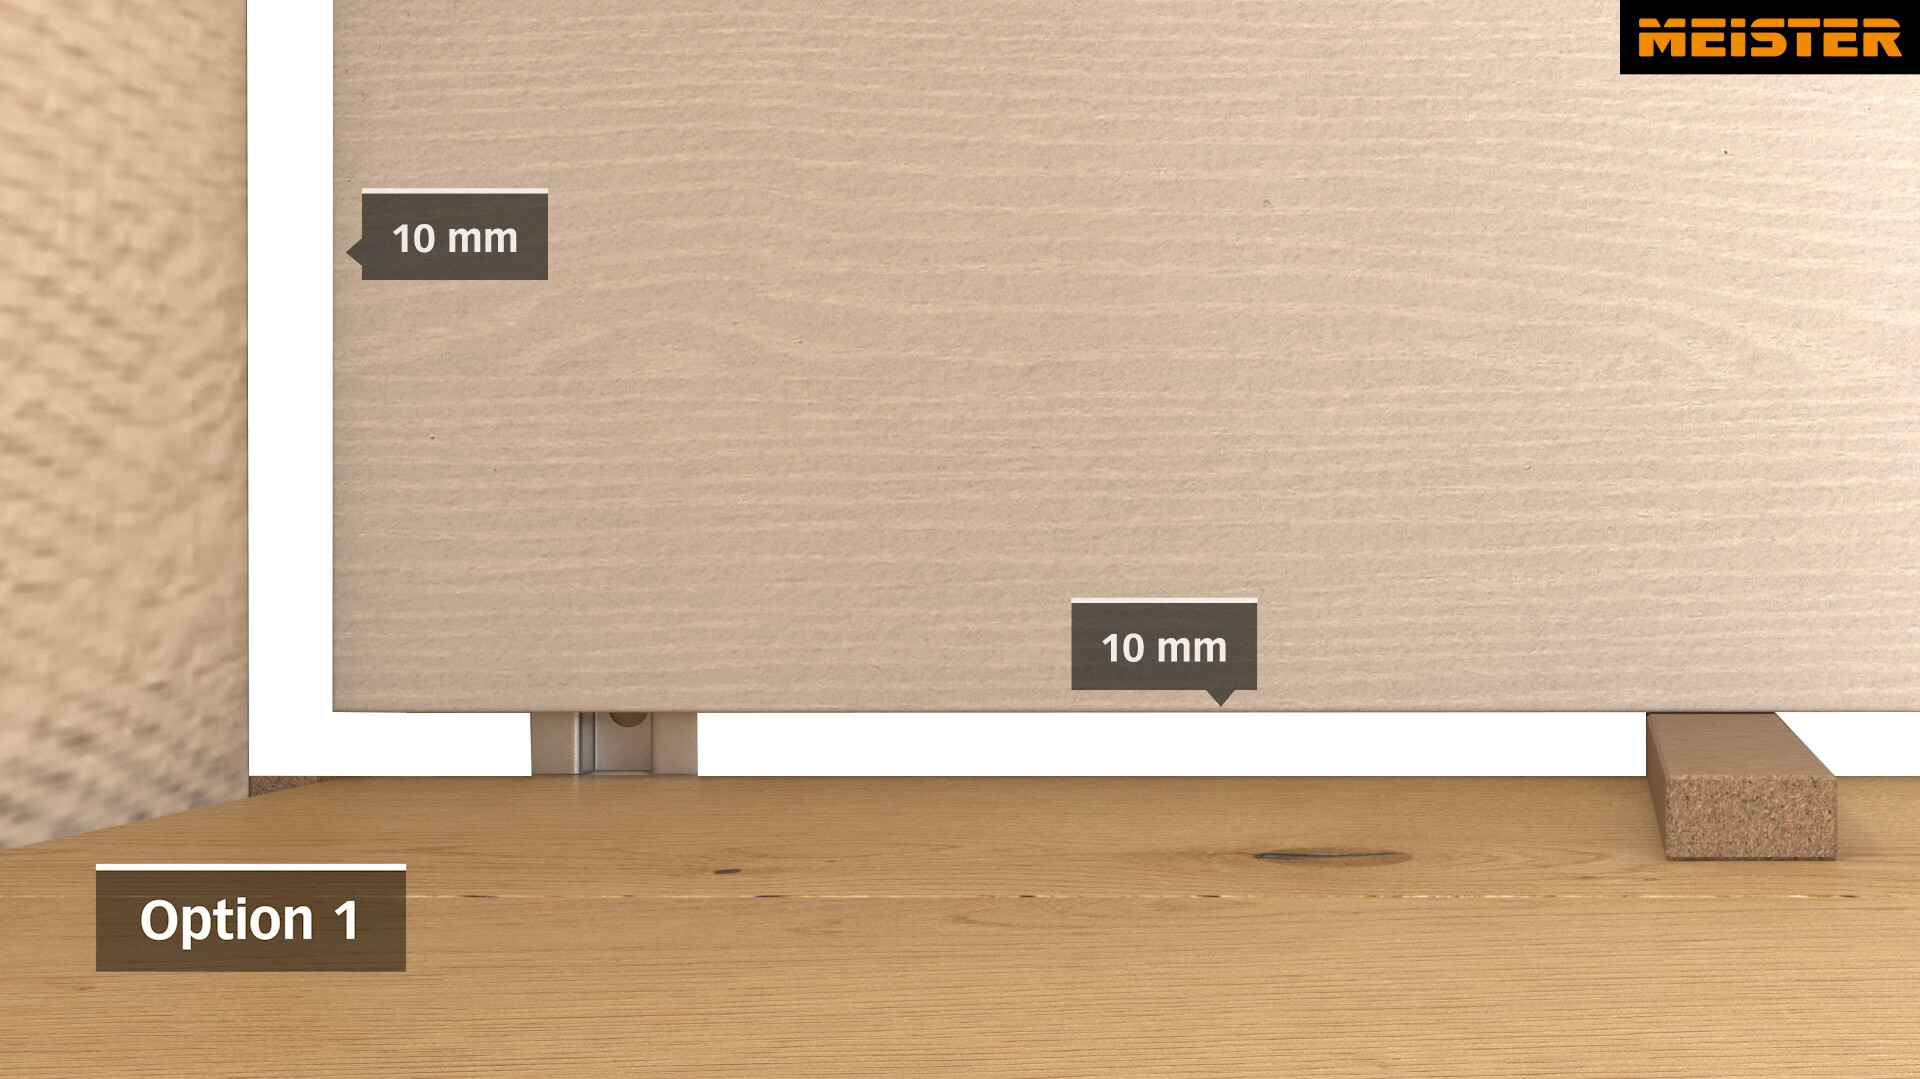
Start by installing the first complete panel in the left-hand corner of the room with the tongues facing the wall. The tongue has to be sawn off the first panel on both the short and long edge. With all the next panels in the first row, only remove the tongues along the long edges. In doing so, leave a gap of 10–14 mm to the wall all around.
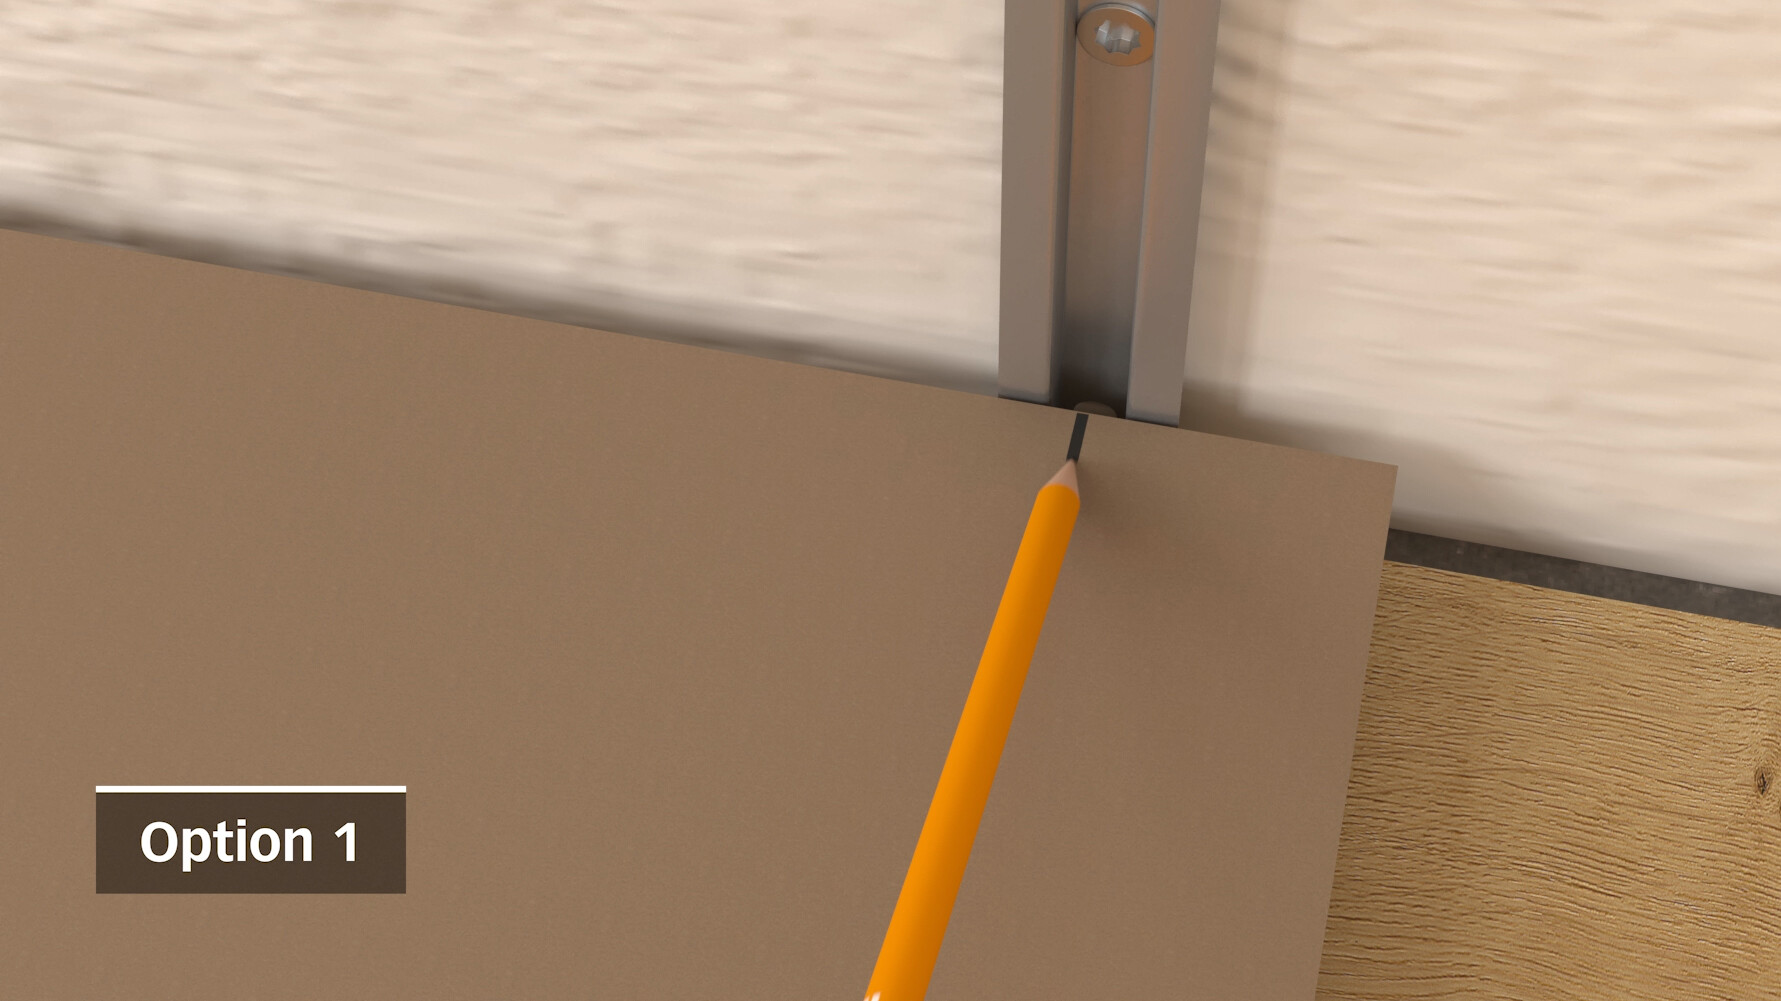
The row of panels is placed on the sub-structure (rail). The middle of the rail is marked using a pencil. Once this measurement has been transferred to the back, fix the start/end clip to the back of the panel with a gap of 2 cm to the outside edge using the supplied screws. The screws have to be fixed in the middle of the cut-out to allow for any inaccuracies to be corrected. Tighten the screws but do not overtighten them. If the clip does not slot in correctly then the profile may have been compressed during trimming. In this case, please bend open the profile to its original dimensions again so that the start/end clip can be clearly heard clicking in.
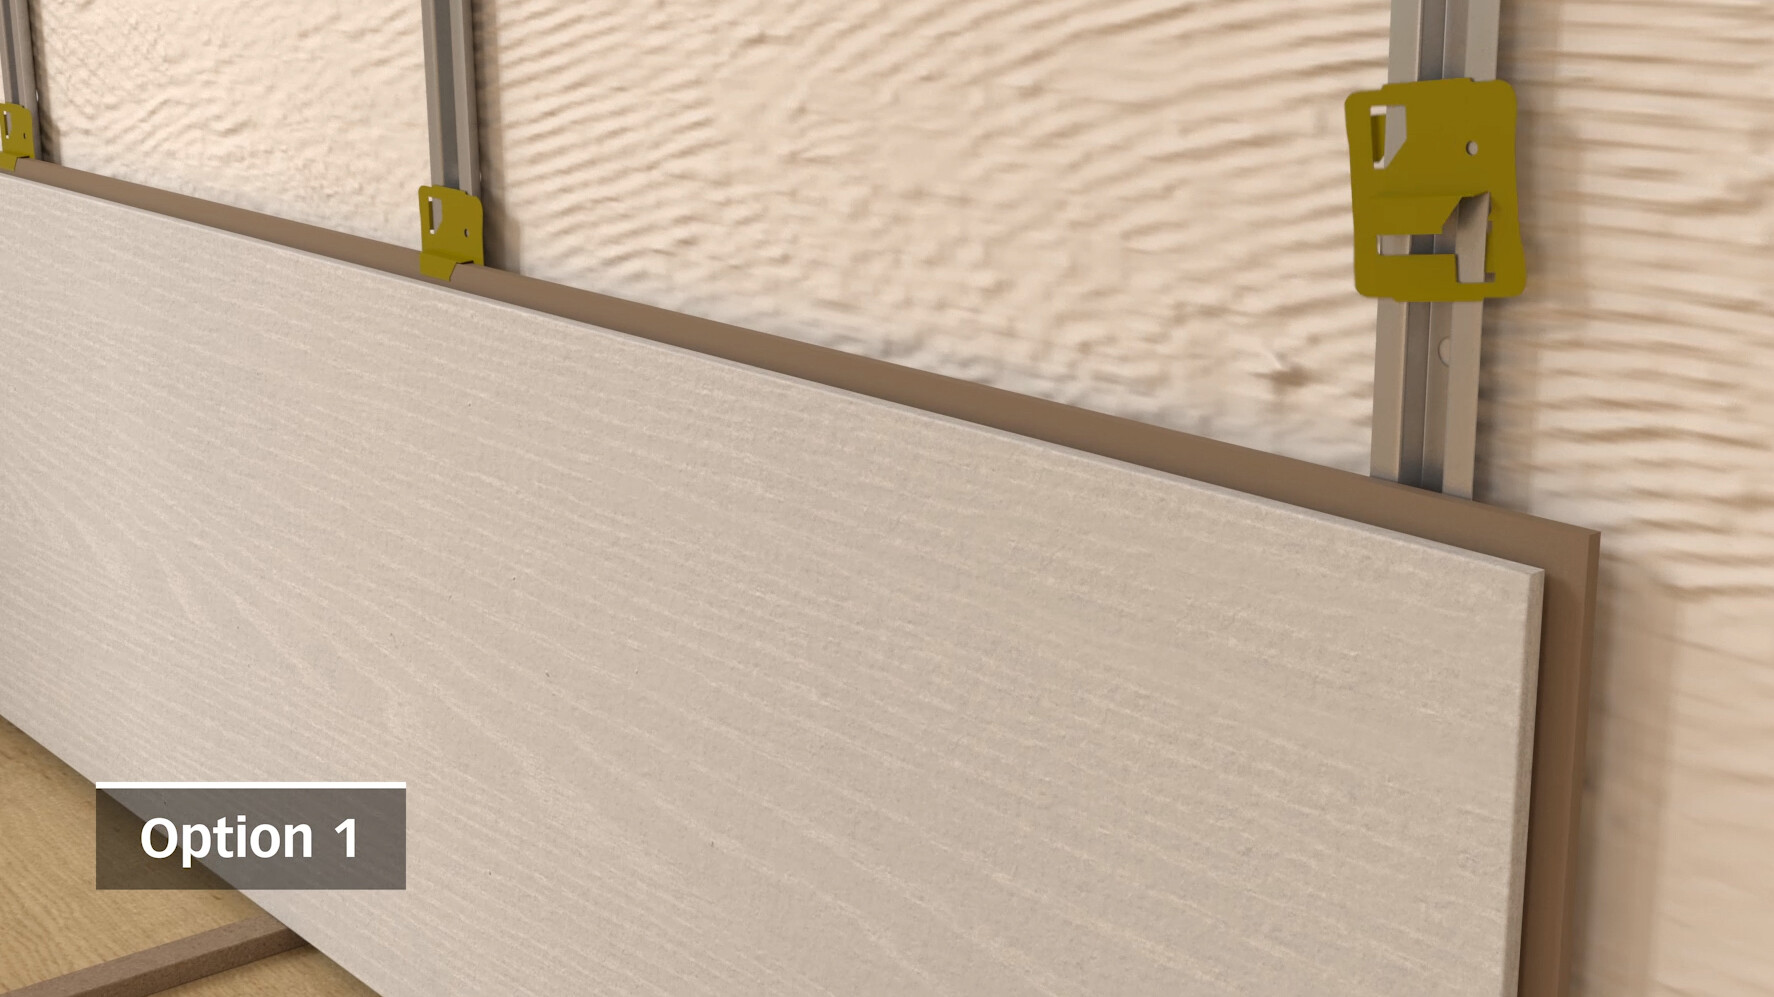
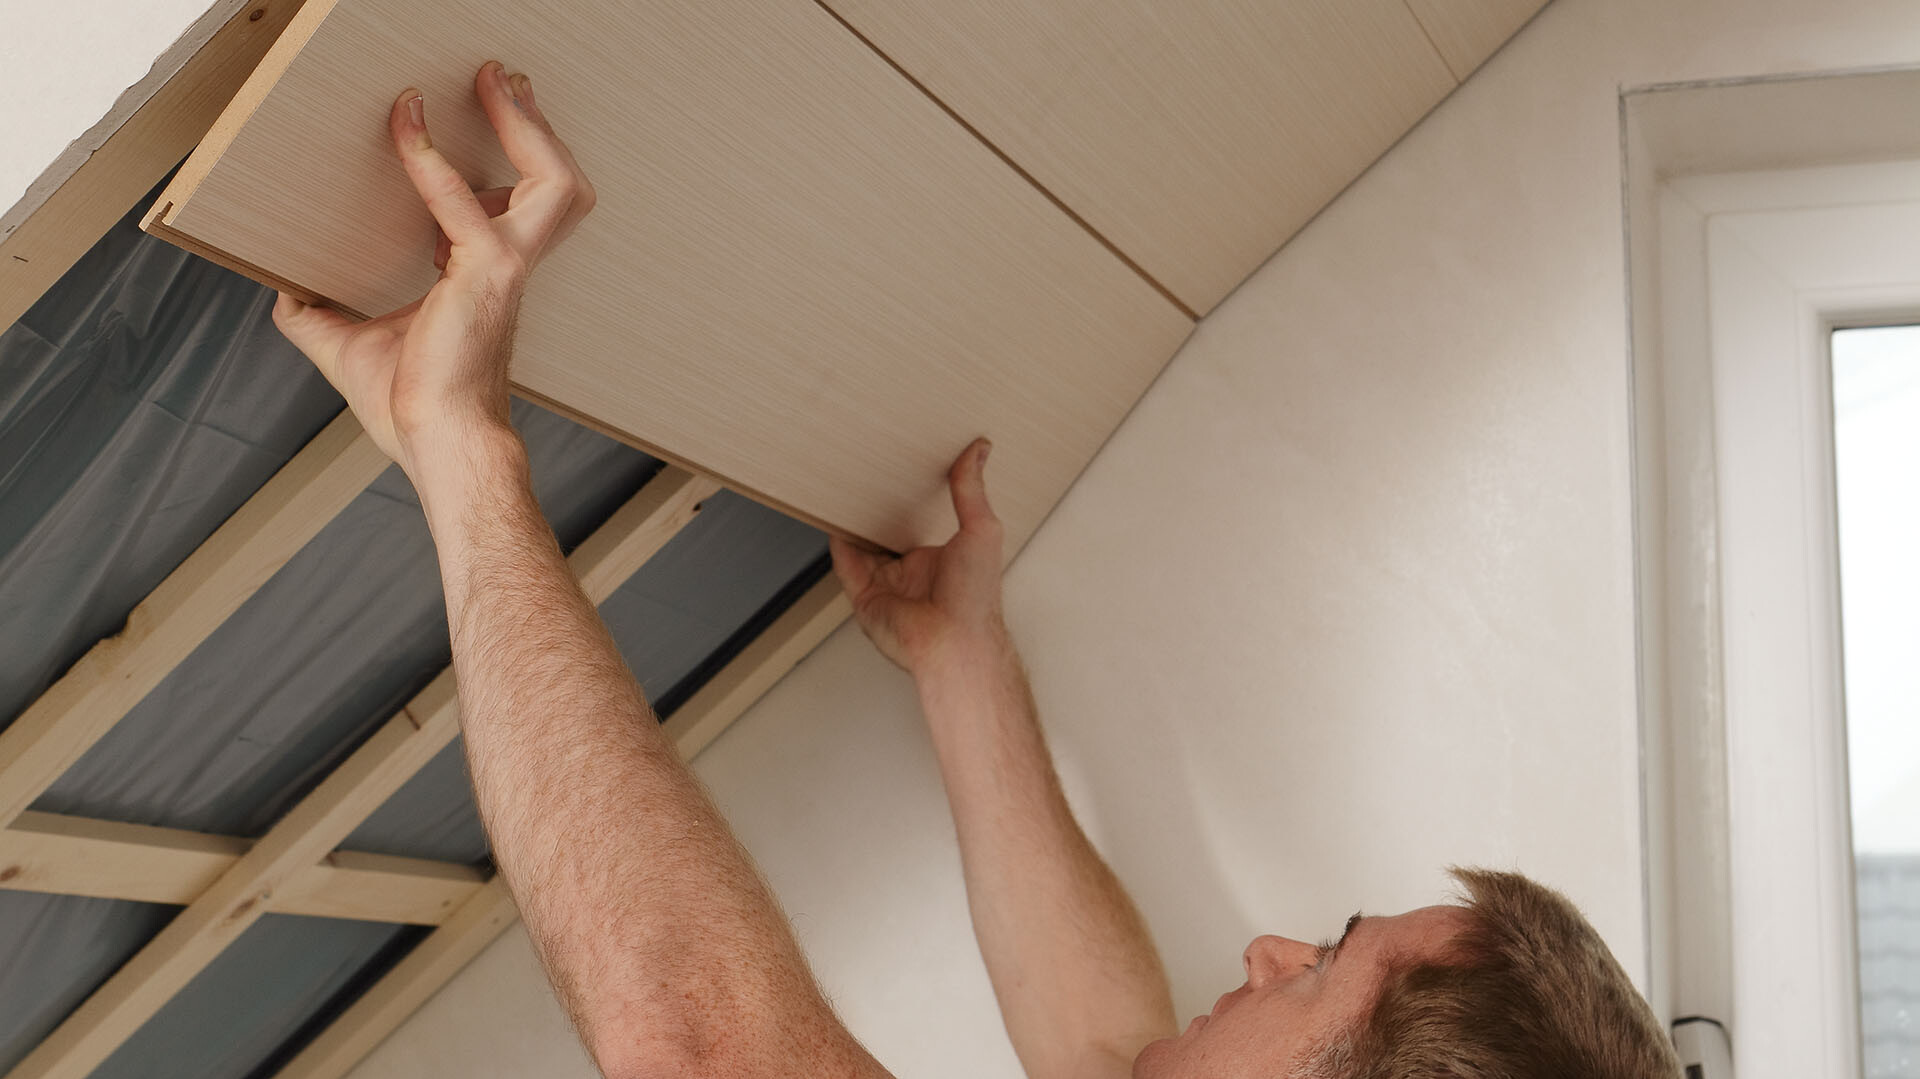
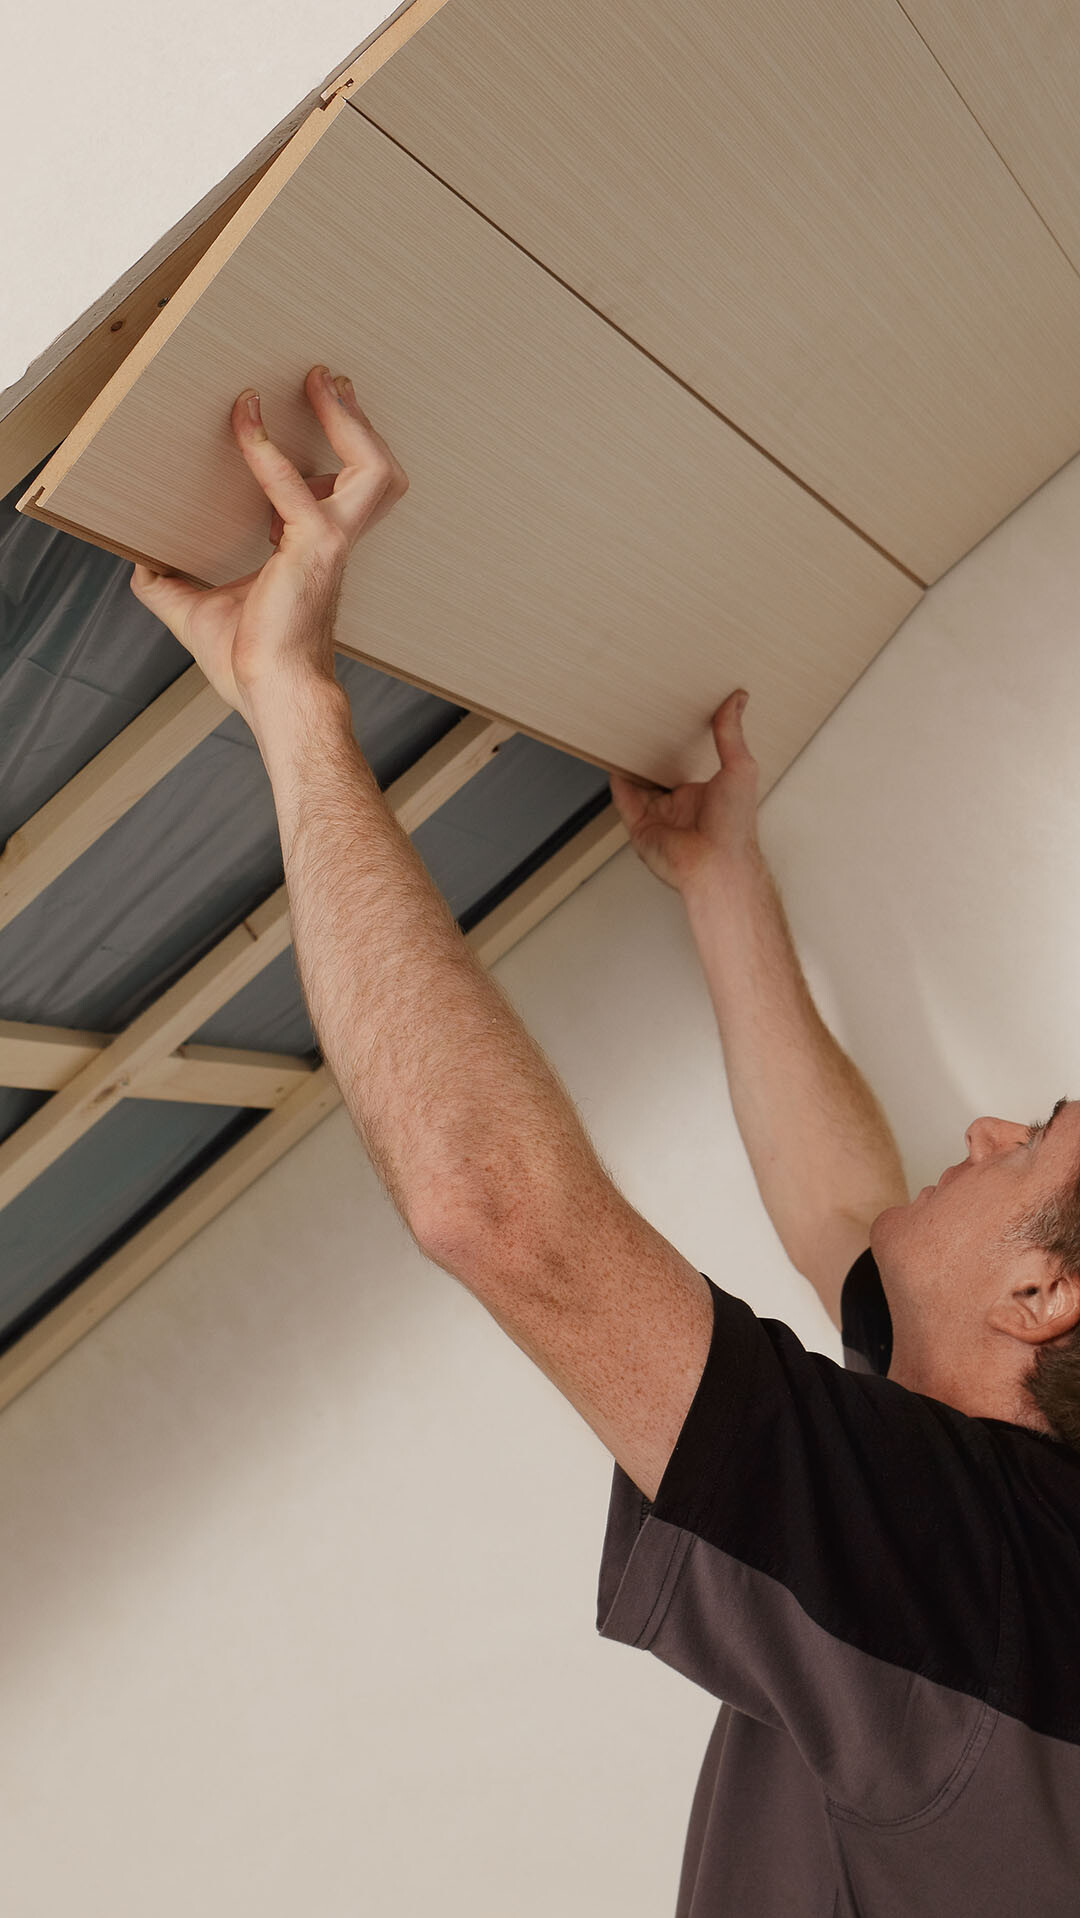
Screw the Top 15 clip for the first row onto the profile then push into the panel groove and lock. Having aligned the first row of panels, fix the fixing clips with screws or rivets to prevent them being displaced during the rest of the installation. Attach the next panel by inserting the tongue into the groove and fix in place using the Top 15 clip as before.
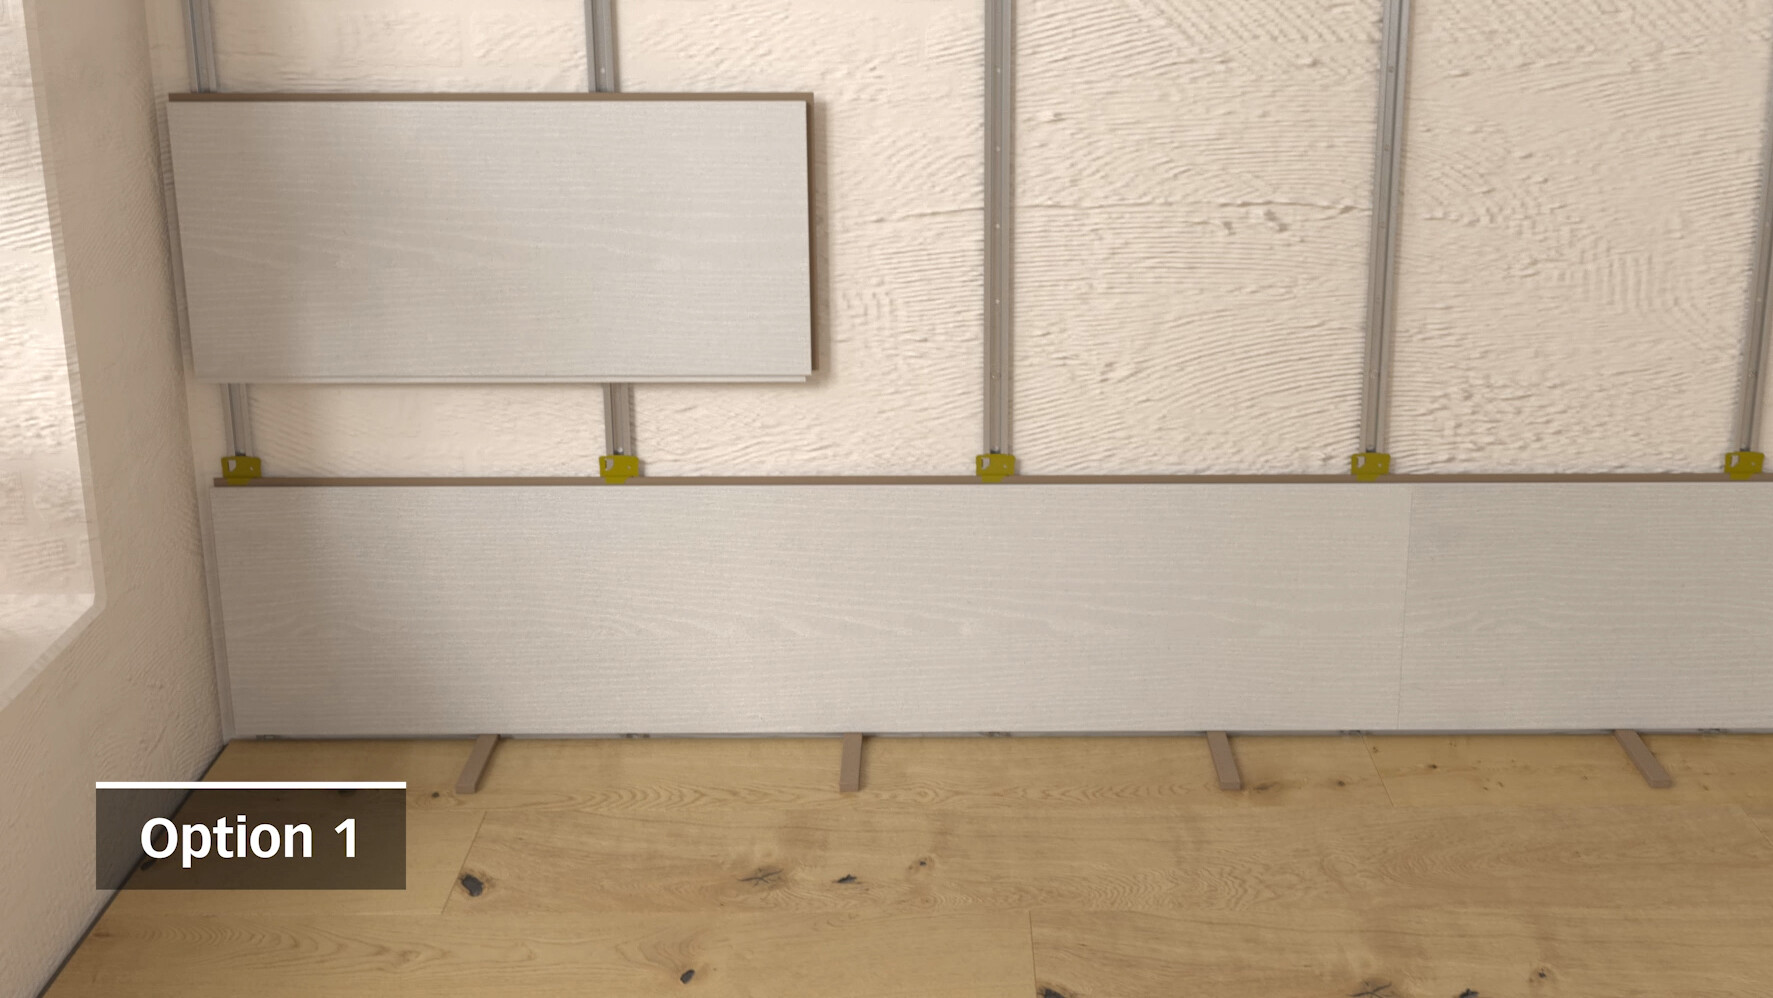
Continue installing the panels row by row in this way. Trim the last panels in every row so that there is at least a 10–14 mm gap to the wall. The last row of panels can be attached like the first one using the start/end clip. To attach the start/end clips on the last row, mark the position of the batten profile using a piece of adhesive tape and transfer the position of the profile onto the back of the panel.
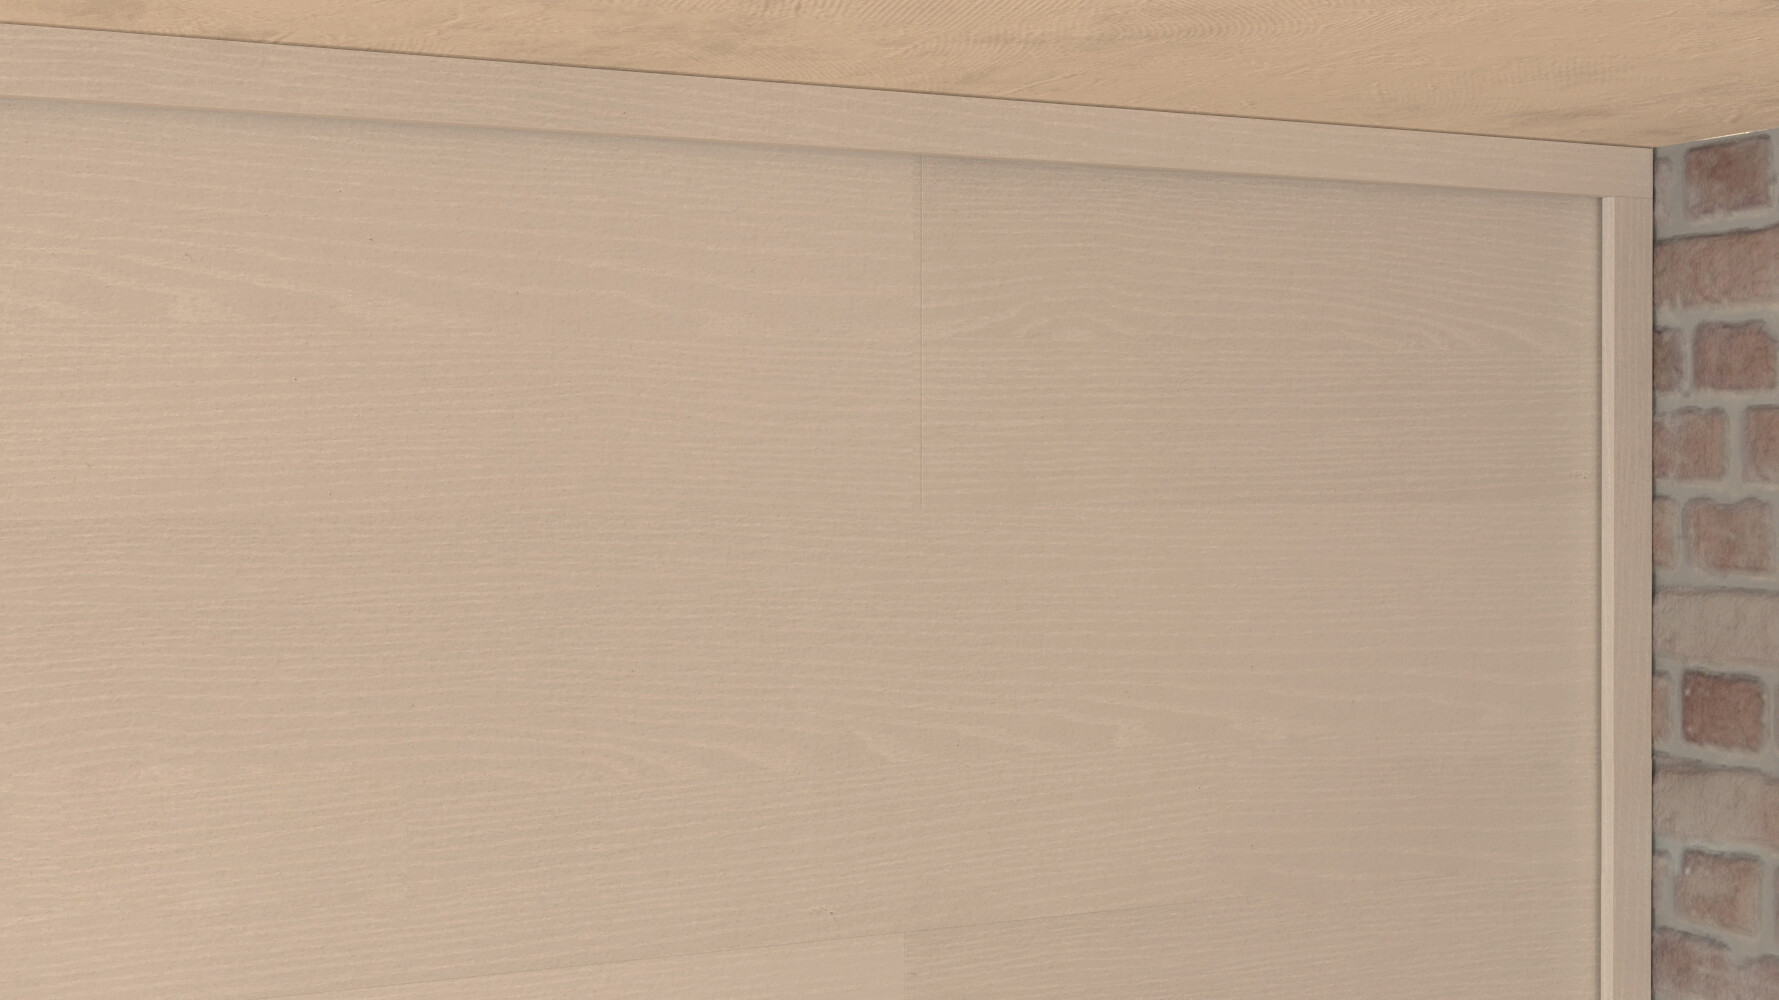
To cover the all-round expansion joints and enhance the overall aesthetic appeal, use MEISTER ceiling edging. MEISTER corner mouldings, hinged moulding strips, Scotia mouldings and cover mouldings are also available for installation, providing a wide variety of solutions to issues such as transitions in sloping ceilings, skylight edging, and lintel cladding.
Please avoid bringing any silicone products into contact with the mouldings for your ceiling panels or wall panels.
If disassembly is required, start with the last panel laid.
Start with the sub-structure, installing dry, single-side planed battens if possible with a minimum cross-section of 20×40 millimetres. The battens should be spaced no more than 40 centimetres apart. The battens must be installed crossways to the panel length and fixed so that there is an even sub-structure. Please use suitable plugs or screws to screw the sub-structure to the raw ceiling or wall at intervals of 40–50 cm. Correct any slight unevenness in the wall/ceiling by placing small wooden wedges underneath the battens.
To avoid damaging the surface prior to installation, be sure to note the following when sawing the elements: The decorative side should be face up when using a bench saw or face down when using a jigsaw or hand-held circular saw.
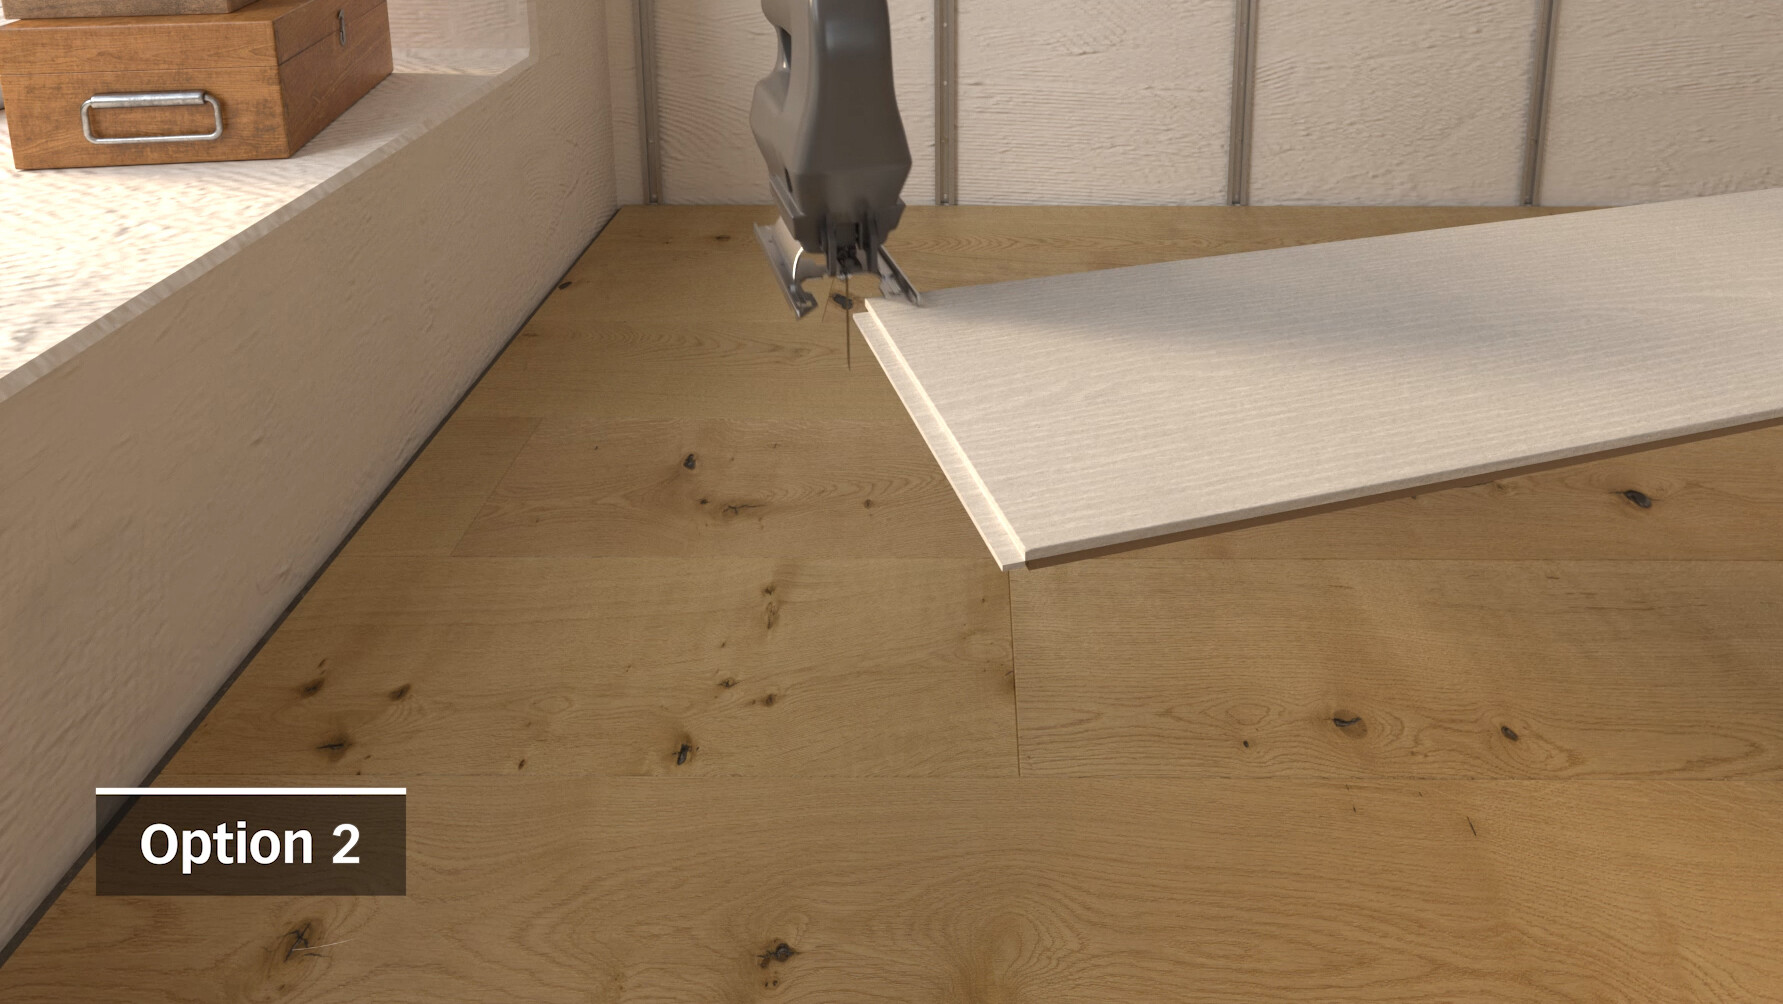
Start by installing the first complete panel in the left-hand corner of the room with the tongues facing the wall. The tongue has to be sawn off the first panel on both the short and long edge. With all the next panels in the first row, only remove the tongues along the long edges.
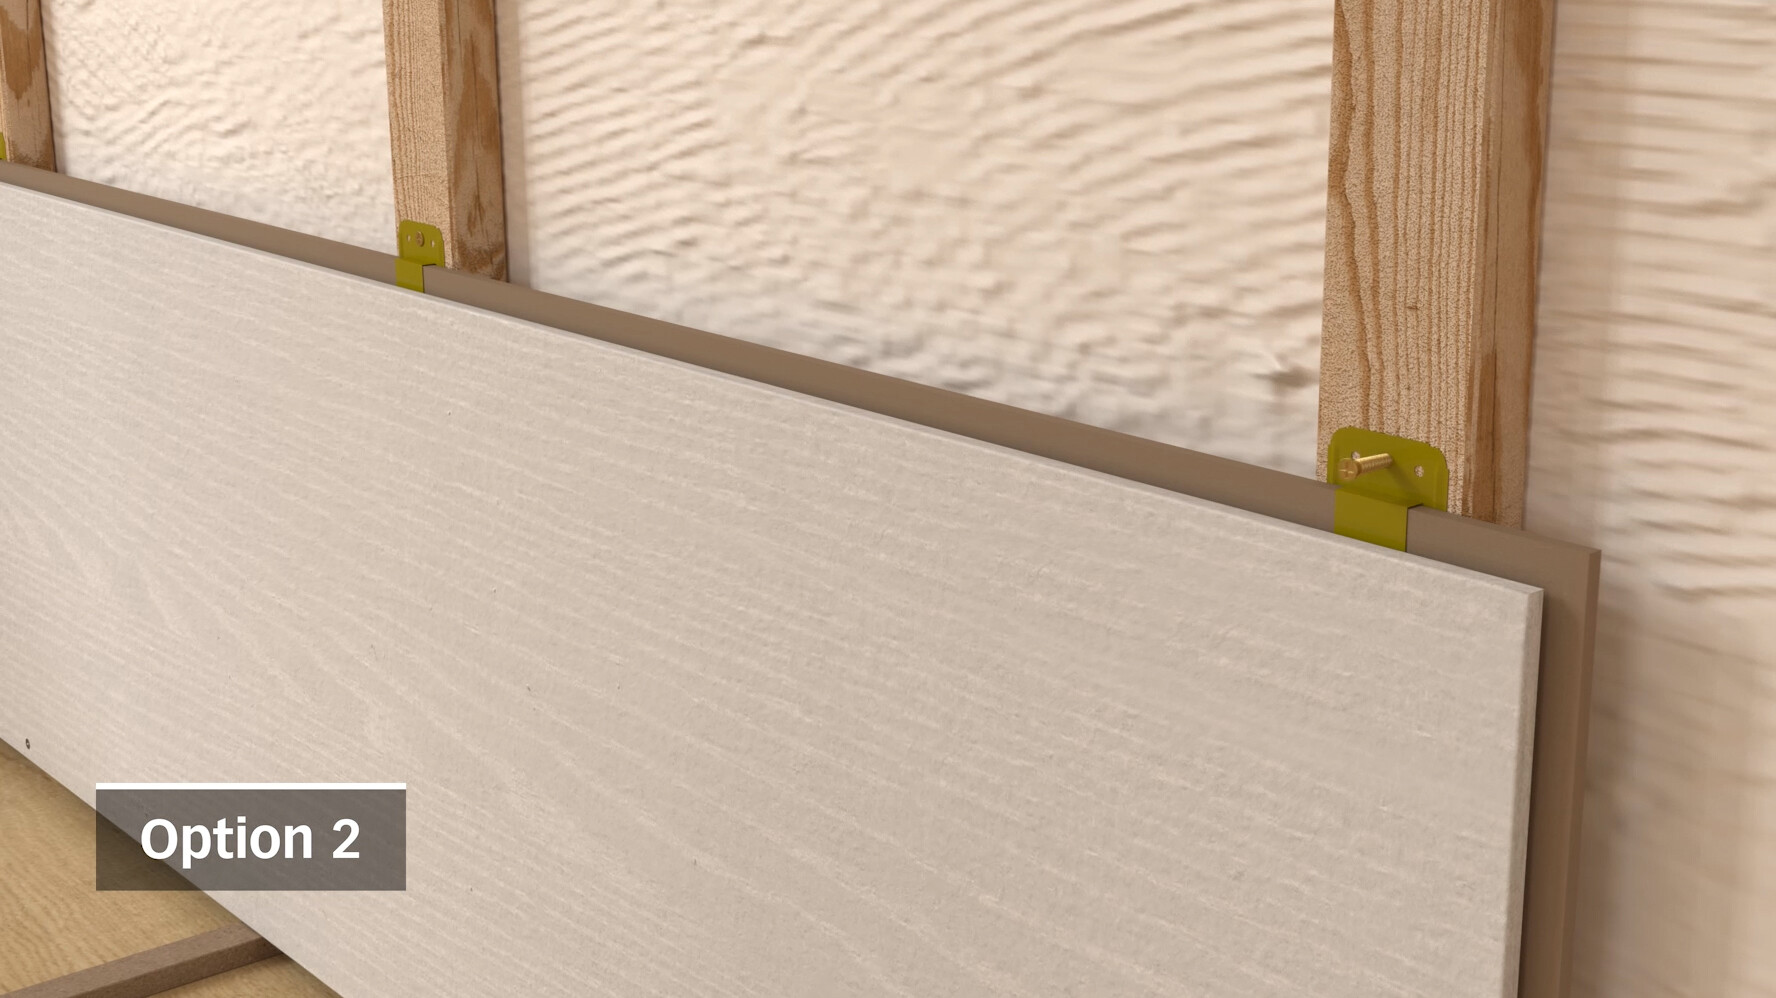
Align the first panel with the groove side facing the centre of the room and fix it right next to the wall area with standard countersunk head screws measuring 3.0×30 mm so that they are covered again later by the ceiling edging. In doing so, leave a gap of 10–14 millimetres to the wall all around. Now slide the claw fitments into the panel groove and screw them to the sub-structure. Make sure that the panel is fixed to each sub-structure batten with claw fitments. Attach the next panel by inserting the tongue into the groove and fix in place using the claw fitments as before. Continue laying row by row in this way.
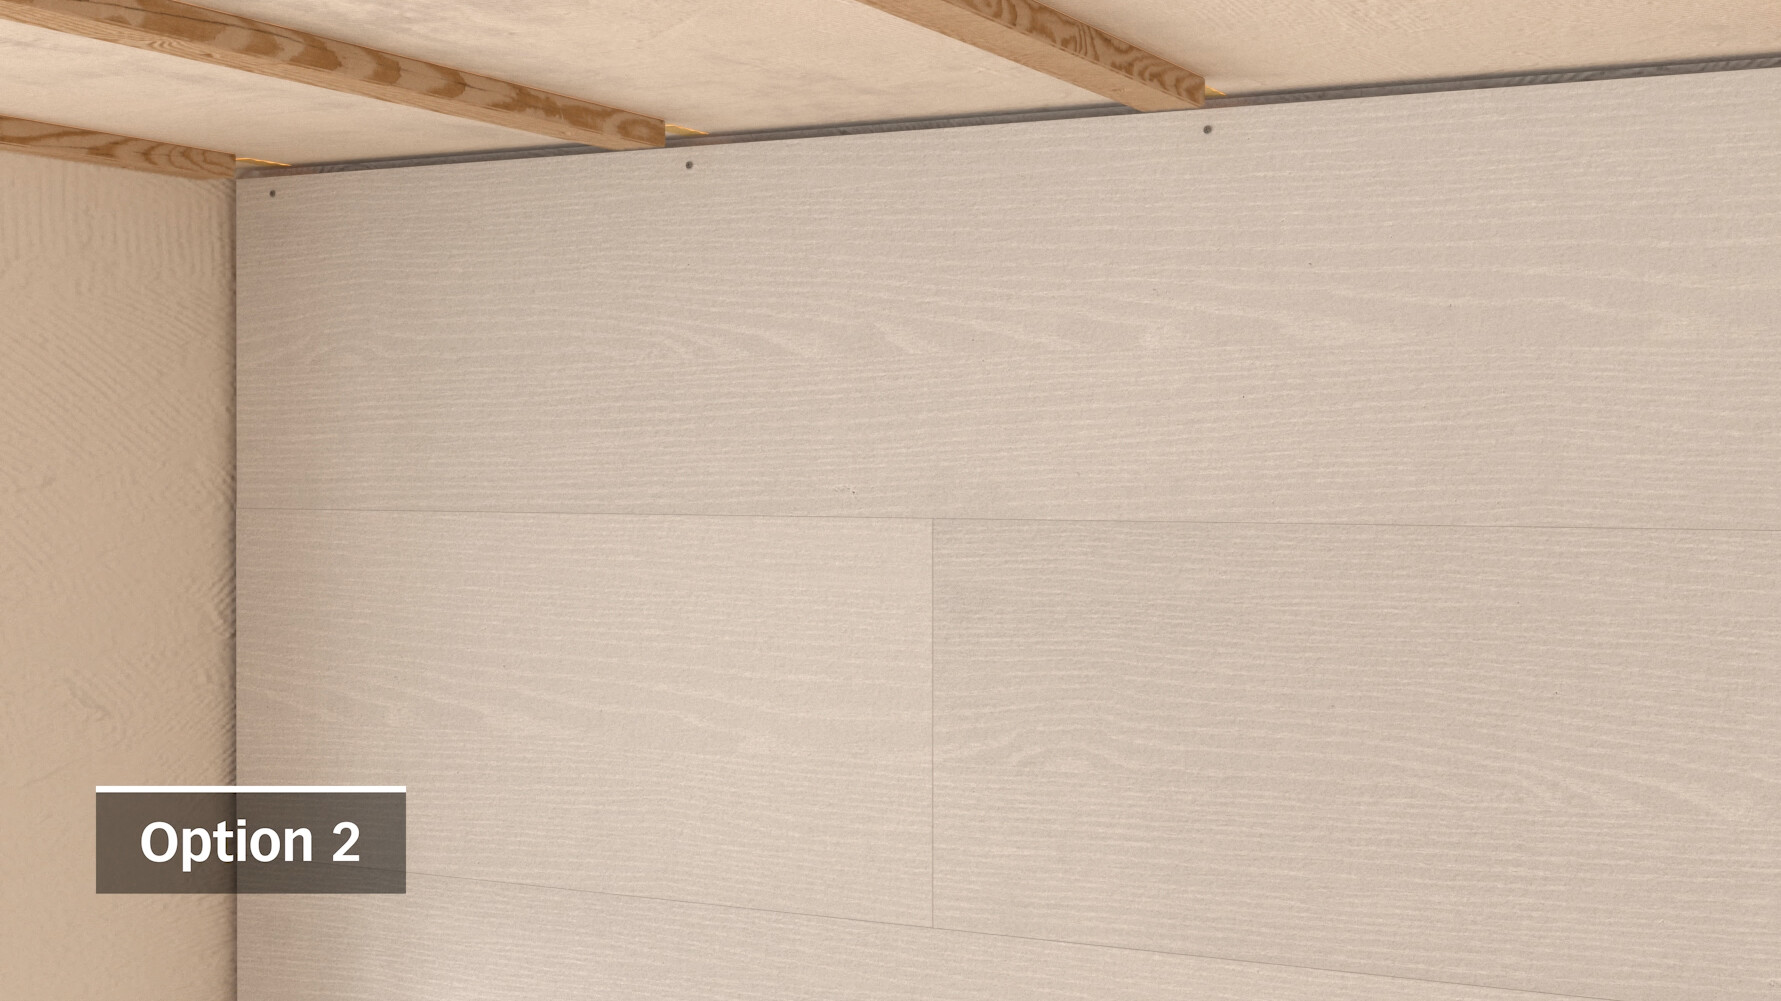
Trim the last panels in every row so that there is at least a 10–14 millimetre gap to the wall. To cut the last row to size, use a spare piece of panel and draw the remaining panel width on it (leaving at least a 10–14 mm gap to the wall). Secure the panel right next to the wall area with standard countersunk head screws measuring 3.0×30 mm like the panels in the first row.

To cover the all-round expansion joints and enhance the overall aesthetic appeal, use MEISTER ceiling edging. MEISTER corner mouldings, hinged moulding strips, Scotia mouldings and cover mouldings are also available, providing a wide variety of solutions to issues such as transitions in sloping ceilings, skylight edging, and lintel cladding.
Please avoid bringing any silicon products into contact with the mouldings.
If disassembly is required, start with the last panel laid.